Clearcoat is an acrylic or urethane layer of protection for the base coat. In reality, clear coat protects the paint from UV damage and scratches. Without it, the paint will crack, peel, or fade after years of repeated sun exposure. But with a clear coat, it’s easy to make it last for 10 to 15 years with proper care and maintenance.
But if for some reason you’re looking to remove the clear coat from the paint, it can easily be done without using special tools. For example, if you’re planning to apply a new layer of clear over certain body panels like the hood or roof, it’s better to remove the existing layer of the tired clear coat before applying a fresh layer to the paint.
The same holds true if you want to remove those unsightly patches of peeling clear coat on old paint. Removing the clear coat in old paint will not make your car look better, but it will even out the damage and slightly improve the texture of the paint. But then again, it also depends on the general condition of the finish. In most cases, you’re better off taking the car to a professional and apply a fresh layer of base coat and clear coat. This procedure is a surefire way to obtain a like-new finish.
Without further ado, here are the easy steps on how to remove clear coat from car paint.
Materials Needed
- 800, 1000, 1200 and 2000-grit sandpaper
- Sanding block
- Small or medium-sized bucket
- Shop towels or microfiber towels)
- Car shampoo
- Wash mitts
- Handy spray bottle
Wet Sanding

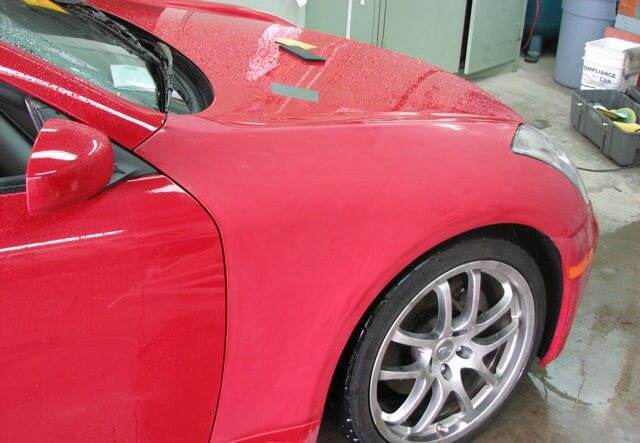
Via g35driver.com
Step 1: Wash the car using car shampoo and clean water. This will remove any excess dirt, grime, and road salts from the finish. It’s always better to work on a clean and dirt-free surface prior to sanding, and this is true if the car you’re working on is extremely dirty or filthy.
Use a hose to wash away standing dirt and dust. Mix a capful of car shampoo in a bucket of clean water and wash the car appropriately using the wash mitts. Rinse the car with clean water after washing.
Step 2: Dry the vehicle or begin sanding. It depends on what you want to achieve and on the condition of the clear coat. If you’re looking to apply a fresh layer of clear over a small surface area, wet sanding is the way to go. But if you want to remove that old layer of peeling and flaky clear coat, dry sanding is more applicable. If this is what you’re looking for, wipe the vehicle dry before sanding.
Step 3: Sand the area lightly. If the surface is relatively pristine and you wish to remove the clear coat, start wet sanding using 1000-grit sandpaper. Soak the sandpaper in a bucket of clean water for 10 to 15 minutes. Wrap the wet sandpaper in the sanding block and begin sanding the surface using a slightly firm back and forth motion.
Dip the sandpaper in a bucket of water when it begins to dry. You can also use a handy spray bottle filled with clean water to wet the surface as you sand. What you’re looking for is consistency. Avoid concentrating on a small area to prevent damage to the base coat. When fully dry, the clear coat is tough as nails, but it removes easily using wet sandpaper.
Step 4: Rinse the area with clean water and wipe dry using a microfiber towel. Run your hands on the paint and inspect the matte finish. By now, the surface will be slightly rough to the touch. In order to smoothen the surface, repeat wet sanding the panel using 1200 grit sandpaper.
Step 5: This next step is optional, but it’s necessary if you want to achieve a smoother finish. Finish off the sanding process by using 2000-grit sandpaper. Wet sand the panel until smooth to the touch. Rinse off the excess residue using clean water.
Step 6: Stop sanding if you see color pigments being removed by the sandpaper. You’ll know the clear coat is gone if you’re see colored residue as you sand. This can be tricky when working with a white car, so pay attention to what you’re doing. You want to remove as much of the old clear coat without damaging the paint underneath.
Step 7: Once the old clear coat is removed, you can now begin applying a fresh layer of paint or a new layer of clear coat. Remember to mask the surrounding area with tape in order to prevent overspray. More reading on introducing the best automotive clear coat for your car.
Dry Sanding
Step 1: If the paint is littered with peeling layers of clear coat, use 800-grit sandpaper on a dry surface. This will remove most of the thicker layers of clear before leveling the surface with set sanding. Wrap the sandpaper in the sanding block and begin sanding on the areas with the worst damage. The goal is to level the area and make it smoother before wet sanding.
Step 2: Next comes the wet sanding. Start with 1000-grit sandpaper and repeat steps 4 to 7 above. Remember to always rinse the surface clean before using higher-grade sandpaper. This prevents the residue from inflicting more scratches on the surface.
Conclusion
The above steps in removing clear coat from car paint can also be performed using a rotary buffer with a sanding attachment. But if you’re only working on a small area, it’s better to sand by hand. While removing the clear coat is the first step in restoring the finish, it won’t bring back the original color and luster of the paint.
Don’t hesitate to consult a professional if the paint is littered with rust, deep scratches with exposed metal surfaces, or cracked/peeling paint.

