There’s no other way of saying it because it takes a lot of work (TONS of work, if you know what I mean) to maintain the cleanliness of any vehicle. And it’s not just the effort involved that makes it tedious. Washing and detailing your car requires the proper know-how along with the weapons of the trade – and we’re talking about the basics like car shampoo, microfiber wash mitts, some microfiber drying towels, and maybe a couple of plastic buckets and cleaning brushes.
With a whole load of misconceptions surrounding the intricacies of washing and detailing a car, we focused our sights on the specifics. The plan is to create 100 DIY car washing and detailing tips that are easy to understand. We pooled over close to 20 years of combined experience in cleaning and maintaining cars to create this handy DIY car washing and detailing guide.
Whether it’s your first time cleaning a car or if you want to expand your knowledge further, here are our exclusive fail-safe methods to cleaning and detailing the interior and exterior of your ride.
Contents
- Section 1: Washing Your Vehicle
- Tip 1: Understanding the difference between washing and detailing.
- Tip 2: Dirt particles are the primary enemy.
- Tip 3: Minimize scratching when cleaning.
- Tip 4: Keeping it cool.
- Tip 5: Rinse from top to bottom.
- Tip 6: Snow foam is optional but required.
- Tip 7: Allow snow foam to dwell.
- Tip 8: Easy wheel cleaning.
- Tip 9: Use a wheel cleaning brush.
- Tip 10: Don’t forget to clean the tires!
- Tip 11: Prevent tire blooming by regularly cleaning the tires.
- Tip 12: Give the vehicle a final rinse.
- Tip 13: Prepare to wash the vehicle.
- Tip 14: The two-bucket method is the way to go.
- Tip 15: Stop using terry cotton rags or sponges to wash your vehicle.
- Tip 16: Wash your vehicle from top to bottom.
- Tip 17: Wash and rinse, wash and rinse.
- Tip 18: Rinse the vehicle thoroughly.
- Tip 19: Dry the vehicle using a microfiber drying cloth.
- Tip 20: Remember friction? Wipe the exterior gently.
- Tip 21: Use pressurized air to dry thoroughly.
- Tip 22: Wipe the exterior side of the windows using a separate towel.
- Tip 23: When to wash your car.
- Tip 24: Wash your vehicle more frequently in cold weather
- Tip 25: This is why it’s important to always wash the undercarriage whenever possible.
- Section 2: Paint Decontamination
- Tip 26: Consider decontaminating the paint.
- Tip 27: Remember, contaminants will cause scratches.
- Tip 28: What you need to know about clay bars and claying a vehicle.
- Tip 29: Why wax after using a clay bar? Here’s why.
- Tip 30: Waxing after claying will level the voids left by contaminants.
- Tip 31: How about iron cleaners?
- Tip 32: When to use an iron cleaner.
- Tip 33: How to use a clay bar and iron cleaner?
- Tip 34: Iron cleaner is also great for removing brake dust on alloy wheels
- Tip 35: You can also use a clay bar on the wheels.
- Tip 36: Rinse well after claying the wheels.
- Section 3: Cleaning And Decontaminating Automotive Glass
- Tip 37: Those contaminants that adhere to paint will also stick to glass.
- Tip 38: But cleaning the glass is not as easy as it seems.
- Tip 39: How to safely decontaminate automotive glass.
- Tip 40: Scrape and clay.
- Tip 41: Don’t forget to clean the interior part of the glass.
- Tip 42: The front windshield demands special care.
- Tip 43: Repeat the same procedure in cleaning the inside part of the rear windshield.
- Tip 44: When to clean interior glass.
- Tip 45: Now is the perfect time to vacuum the interior.
- Section 4: Polishing The Paint
- Tip 46: What’s the difference between waxing and polishing?
- Tip 47: What’s the best product for polishing and waxing?
- Tip 48: Is it better to polish by hand or machine?
- Tip 49: What’s the difference between a rotary and dual-action (DA) polisher?
- Tip 50: Which polisher is ideal for beginners?
- Tip 51: Polishing by machine? You need the right buffing pads.
- Tip 52: In fact, you only need a set of polishing and buffing pads.
- Tip 53: How to polish a car? Follow these easy steps.
- Section 5: Waxing The Paint
- Section 6: Cleaning The Interior
- Section 7: Apply The Finishing Touches
- Section 8: Additional Cleaning & Detailing Tips
- Tip 66: Cleaning the engine bay.
- Tip 67: For new cars, here’s how to keep it clean under the bonnet.
- Tip 68: But for older cars, here’s how to clean the engine bay.
- Tip 69: Here’s a secret degreasing solution to restore a dirty engine bay!
- Tip 70: First, rinse with water.
- Tip 71: Spray the degreaser liberally.
- Tip 72: Agitate the degreaser using a soft brush or sponge.
- Tip 73: Rinse gently.
- Tip 74: After rinsing, dry the engine bay using a microfiber towel.
- Tip 75: Now is the perfect time to inspect the engine bay.
- Tip 76: Here’s another secret tip we use to maintain a slick engine bay.
- Tip 77: Detailing the engine bay is easy, here’s how.
- Tip 78: How to restore the clarity of headlight lenses.
- Tip 79: How to restore headlights using toothpaste.
- Tip 80: How to restore auto headlights using baking soda and vinegar.
- Tip 81: How to restore plastic headlights using a restoration kit.
- Tip 82: But for stubborn oxidation, sanding is the only way to restore clear plastic headlights.
- Tip 83: Follow the directions.
- Tip 84: Is it safe to apply wax on plastic headlights?
- Tip 85: How to wax plastic headlights.
- Tip 86: How to prevent plastic headlights from yellowing, hazing, and oxidation.
- Tip 87: Does halogen bulbs cause yellowing and hazing of the headlights?
- Tip 88: Waxing versus spray waxes: what’s the difference?
- Tip 89: The problem with spray waxes.
- Tip 90: Spray wax is easy to apply.
- Tip 91: How to detail and restore vinyl convertible roofs.
- Tip 92: How to clean fabric convertible roofs.
- Tip 93: Maintaining the carpets and upholstery.
- Tip 94: How to clean auto carpets.
- Tip 95: How to clean fabric upholstery with an interior cleaner.
- Tip 96: How to remove lipstick stains on car seats.
- Tip 97: You can also use interior cleaner to remove lipstick stains.
- Tip 98: Steam cleaning is the best way to clean the carpets and upholstery.
- Tip 99: How to remove foul odors inside your car.
- Tip 100: Using baking soda to maintain a clean-smelling car.
- Tip 101: Baking soda as an air freshener?
- Tip 102: Activated charcoal also works in the same way.
- Tip 103: Coffee is also a nice alternative to chemical air fresheners.
- Tip 104: Does your vehicle have a cabin filter?
- Tip 105: Invest in a nice set of floor liners.
- Tip 106: Never allow wet floor mats to dry inside your vehicle.
- Tip 107: Avoid using interior protectant on the steering wheel, shift knob, and pedals.
- Tip 108: Wash your vehicle and clean the interior at least once a week.
Section 1: Washing Your Vehicle
Tip 1: Understanding the difference between washing and detailing.
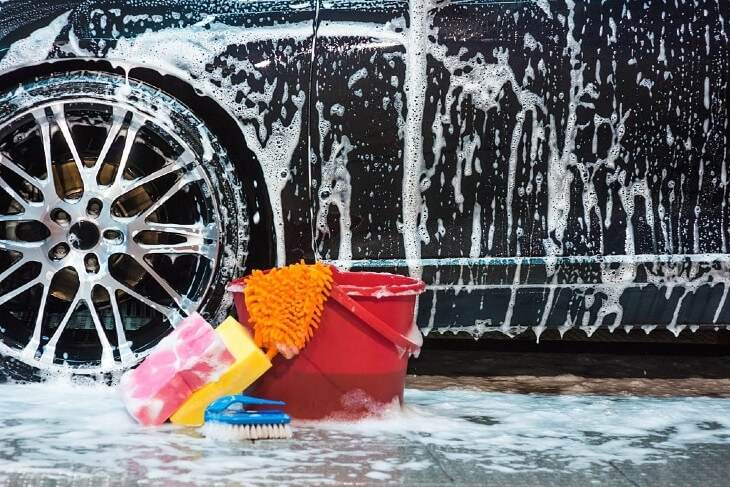
Remember that washing and detailing are two separate worlds. One can survive without the other (because you can wash without detailing the vehicle, but you can’t detail the exterior without washing it first), but both are necessary to maintain and restore a slick, glossy, and eye-catching finish. If you’re looking to detail the paint (like applying wax, polish, or sealant) after washing, you’ll need to decontaminate the finish after washing. Paint is like glass. It’s incredibly durable and yet prone to scratches and swirl marks. As with any washing and detailing job, the goal is to reduce friction while cleaning and detailing any type of vehicle.
Tip 2: Dirt particles are the primary enemy.
Minimizing friction is of utmost priority when cleaning your car. This holds especially true if your vehicle has a black or dark-colored paint job, all of which are more prone to scratching and swirling than lighter-colored paint. But how will you minimize friction when cleaning or waxing the paint means touching the paint and applying some effort to remove dirt? It boils down to applying the right techniques. Of course, friction is hard to avoid, but it’s not friction itself that causes scratching or marring. Deep-seated particles or standing dirt are the primary causes of hairline scratches and swirl marks. This is the reason why it’s bad practice to wipe your vehicle with a dry cloth. It’s best to AVOID wiping the paint with a dry cloth at all times.
Tip 3: Minimize scratching when cleaning.
In order to further minimize the possibility of scratching the paint as you clean and wax the paint, we came up with our own set of tried-and-tested procedures, all of which are the very same methods we do in cleaning and maintaining our own vehicles. And while some of our tips may seem excessive, you’ll be surprised at how much time, effort, and money you’ll save by simply learning how to properly wash a car. Forget about everything you know about washing a car because we’re getting to the real basics, the same techniques applied by professional detailers on YouTube and on those expensive auto detailing shops.
Tip 4: Keeping it cool.
Before washing your vehicle, make sure all surfaces are cool to the touch. Never wash a hot car, and do not ever splash cold water on hot surfaces such as the wheels and the hood of the vehicle whenever possible. In the same manner, it is always best to avoid direct sun contact when washing a vehicle. Park the vehicle in an enclosed garage whenever possible or try washing an hour before sunset or early in the morning if you prefer. The point is to always work on a cool surface to prevent water streaks or other ugly marks on the paint, glass, rubber seals, and chrome surfaces.
Tip 5: Rinse from top to bottom.
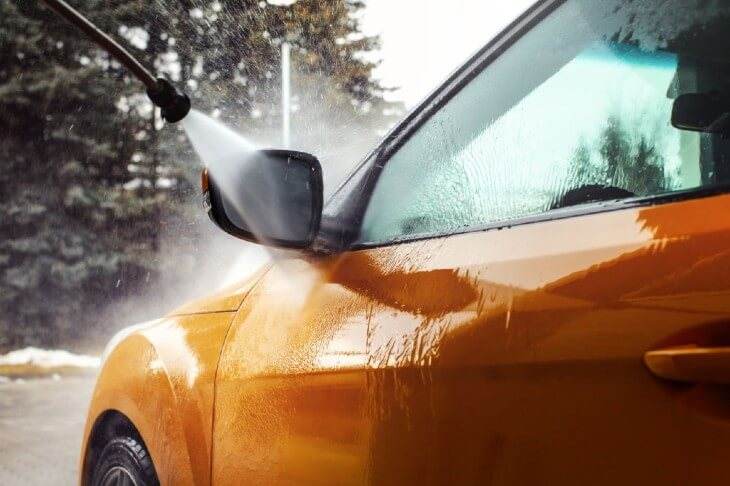
The first step is to rinse the entire vehicle with clean water, preferably using a pressurized washer. If you don’t have access to a pressure washer, connecting a garden hose to a steady water supply will do the trick. Spray water from the top to the bottom of the vehicle. Start by rinsing the hood, roof, and trunk before moving downwards towards the doors, bumpers, and finally the wheels and tires. Don’t forget to spray water under the fenders to rid the chassis/underbody of salt and dirt. If you’re working with an excessively dirty or muddy vehicle, you can either remove excess mud and dirt with a pressure washer or use a separate wash mitt to rid the surface of excess dirt as you rinse the paint.
Tip 6: Snow foam is optional but required.
After rinsing the exterior, you should consider applying snow foam. You can buy a separate bottle of snow foam apart from the usual car shampoo, but you can also use car shampoo in snow foaming a vehicle. It all depends on what you can afford, but the results are the same if you follow the right techniques. Snow foam is applied by a snow foam lance attached to air pressure. We prefer mixing two-parts of car shampoo to ten parts water. The foam should be light enough to run off the exterior after a couple of minutes, so it’s important to adjust the cleaning solution as needed.
Tip 7: Allow snow foam to dwell.
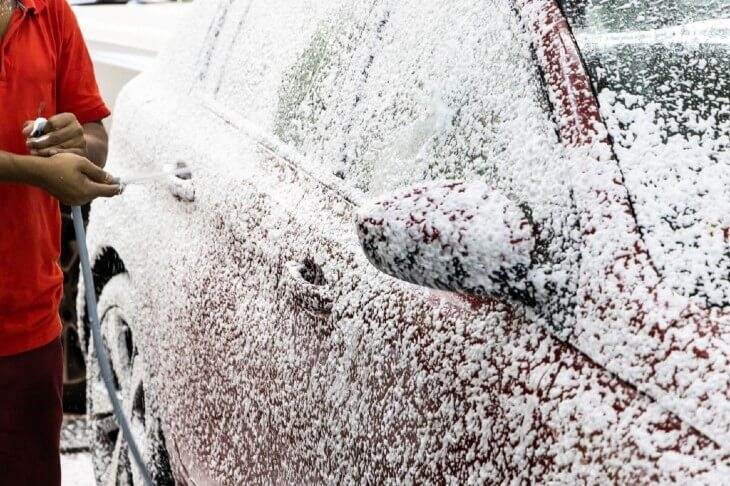
Spray snow foam all over the vehicle, including the wheels and tires. After spraying, the trick is to allow the foam to dwell or soak on the surface. This allows the solution to literally dissolve standing dirt as the foam drips from the body of the vehicle towards the ground. Depending on the type of product you’re using and prevailing weather conditions, this might take a while, or anywhere from two to 10 minutes. You should never allow the snow foam to completely dry over the surface. Rinse the foam using mild pressure, starting from the uppermost portions of the vehicle all the way to the wheels and tires. Make sure to remove all traces of foam before proceeding.
Tip 8: Easy wheel cleaning.
After rinsing away the snow foam, you can begin cleaning the wheels and tires. We like using wheel cleaners for this procedure. Yes, wheel cleaners are an added expense, but it’s worth it if you’re looking to save time and elbow grease in cleaning wheels and tires. Almost all wheel cleaners are formulated to change color when dissolving dirt, brake dust, and metallic contaminants. This lets you know the product is working. Spray the wheel cleaner liberally all over the wheels and tires and allow to dwell for at least two to five minutes.
Tip 9: Use a wheel cleaning brush.
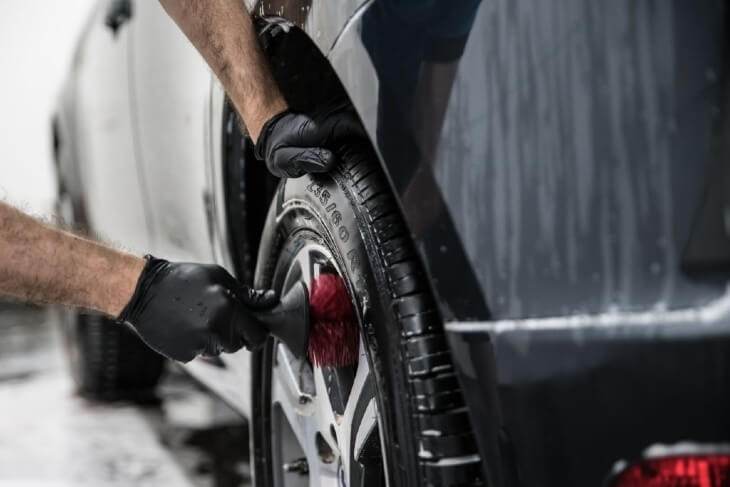
Stop using old rags or sponges in cleaning wheels and tires. Alloy, stainless steel, chrome, or painted wheels are also prone to scratching. In order to minimize scratches, use a wheel cleaning brush, but never the stiff ones. We have at least two or three brushes in our arsenal to effectively clean all sizes and types of wheels in half the time. Using a wheel brush also enables you to cover every nook and cranny including the inside of the wheel. After allowing the wheel cleaner to soak on the wheels, lightly agitate the cleaner over the entire surface of each wheel using a wheel brush. Don’t forget to periodically rinse the wheel brush by dipping it in a bucket of clean water mixed with two capfuls of car shampoo. This prevents the removed dirt from being reapplied to the wheel surface.
Tip 10: Don’t forget to clean the tires!
Have you heard of tire blooming? It occurs when tires (particularly the sidewall) changes color from black to ugly patches of brown. Tire blooming is caused by antiozonants, which are UV-protecting chemicals applied to the rubber compound. As the antiozonant is exposed to heat, air, moisture, and ultra-violet rays, the antiozonant oxidizes and turns brown, hence causing tire blooming. And while this is not necessarily a bad thing since antiozonant is meant to keep the rubber from drying or cracking, tire blooming makes your car look old and dirty.
Tip 11: Prevent tire blooming by regularly cleaning the tires.
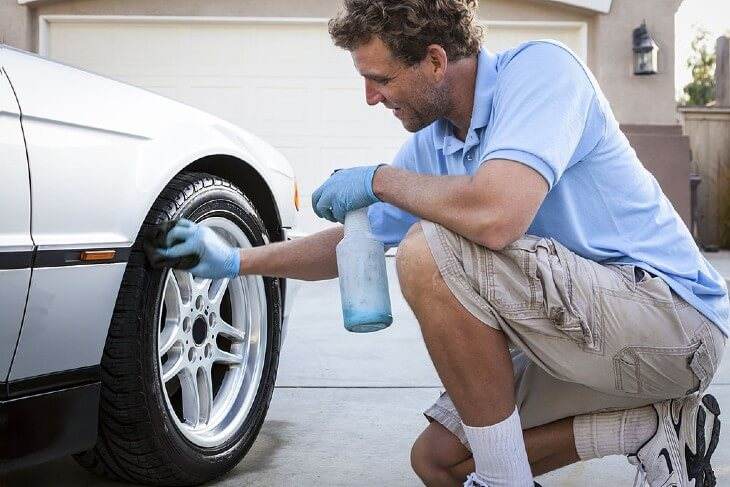
After cleaning the wheels, show your tires some love by using a soft-bristle brush. Never scrub the tires or sidewall forcefully with a stiff-bristled brush. After cleaning the wheels, it’s best to mildly clean the tires with water and car shampoo. Hard brushing will NOT remove tire blooming, so go gentle on your tires. If you notice signs of blooming, you’ll need to apply some tire dressing after washing, but not after giving the wheels and tires a final rinse. Make sure to remove all traces of wheel cleaner and soap to prevent staining. We’ll talk more about tire dressings at the later part of this guide.
Tip 12: Give the vehicle a final rinse.
We like to give the entire vehicle a final rinse after cleaning the wheels and tires. Spray clean water on the hood, roof, and trunk of the vehicle and work your way to the wheels. This ensures all traces of snow foam and wheel cleaner are removed from all exterior surfaces.
Tip 13: Prepare to wash the vehicle.
Remember, snow foam will NOT remove dirt and mud, but rather loosen all surface contaminants for easy removal. Even after applying snow foam, you’ll need to follow up with a full-body wash using water and high-quality car shampoo. Now, the paint in your car might seem tough as nails, but you can think of it as your skin. Gentle cleaning is best and helps avoid marring or scratching the clear coat. For this, you’ll need a pH-neutral car shampoo that won’t strip off the existing wax in your paint. When cleaning a car, you’re not trying to remove wax, just the dirt. NEVER use dish soap to clean your car unless you’re trying to remove wax. But still, dish soap will harm plastic and rubber trim on the exterior of your car. If you don’t have car shampoo, you can use ordinary hair shampoo instead of dish soap, but only as a last resort. However, you’ll need to use a lot of hair shampoo to clean an entire car, which is not exactly the most economical method. Car shampoo is still the best.
Tip 14: The two-bucket method is the way to go.
When washing a vehicle, it’s best to use the two-bucket method for two reasons: First, it’s easier. Next, it prevents cross-contaminating the washing solution with dirt from the paint. Grab two medium-sized plastic buckets. On the first one, mix a capful or two of car shampoo with water until foamy – this is your wash bucket. On the other hand, simply fill the next bucket with nothing but clean water, which is now your rinse bucket.
Tip 15: Stop using terry cotton rags or sponges to wash your vehicle.
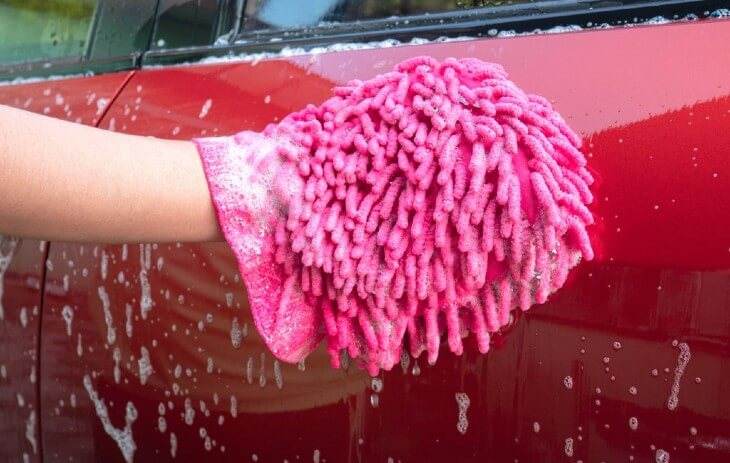
In our experience, microfiber wash mitts work best in washing a car. Wash mitts can hold double or triple its weight in soapy water. Car shampoo is not only formulated to clean paint. It also provides adequate lubrication over the paint surface to prevent scratching while picking up dirt and grime. When it comes to washing a car, more is better. Using a proper wash mitt ensures more soap is applied to a particular surface as you wash, hence ensuring more lubrication in the process. Don’t forget, the mere act of running your finger over dry and dirty paint is enough to leave an ugly and permanent mark on the paint. Minimizing friction is the key to washing a car properly, and the lubricating properties of car shampoo will do the trick.
Tip 16: Wash your vehicle from top to bottom.
Grab your wash mitt and dunk it in your bucket of soapy water. Lift the wash mitt from the bucket and wash your car from top to bottom. Similar to rinsing, wash the roof, hood, and trunk before washing the windows, doors, and the bumpers. This technique prevents contamination as more and heavier dirt is found on the parts of the vehicle that are closest to the ground, such as the doors, fenders, and rocker panels. Washing from top to bottom prevents dirt from the lower parts of the car to eventually scratch the upper panels as you wash the exterior. Keep this in mind if you have a black or dark-colored vehicle. Black vehicles look good from the factory, but it takes less than a week of neglect to ruin the showroom shine you’ve come to love. Indeed, black vehicles are the hardest and most tedious to clean. It’s also tricky to polish and wax a black vehicle, which we’ll also discuss later.
Tip 17: Wash and rinse, wash and rinse.
The washing procedure should look like this: wash the roof, rinse the wash mitt in clean water, wash the hood, rinse again, wash the trunk, rinse again – you get the idea. By constantly rinsing the wash mitt after washing a particular area of the vehicle, you are minimizing the chances of inducing mild scratches on the next panel you’re washing. This especially holds true when washing an extremely dirty or muddy car. If this is the case, you’ll probably need to wash the vehicle twice.
Tip 18: Rinse the vehicle thoroughly.
Grab your pressure washer and rinse the vehicle with clean water. Go from top to bottom using moderate pressure. Work your way from the roof, hood, and trunk all the way down to the wheels and tires. Also, give the underbody a final blast of clean water by spraying clean water under each fender. After rinsing, give yourself a pat on the back. You’ve done it, and you should be proud of yourself.
Tip 19: Dry the vehicle using a microfiber drying cloth.
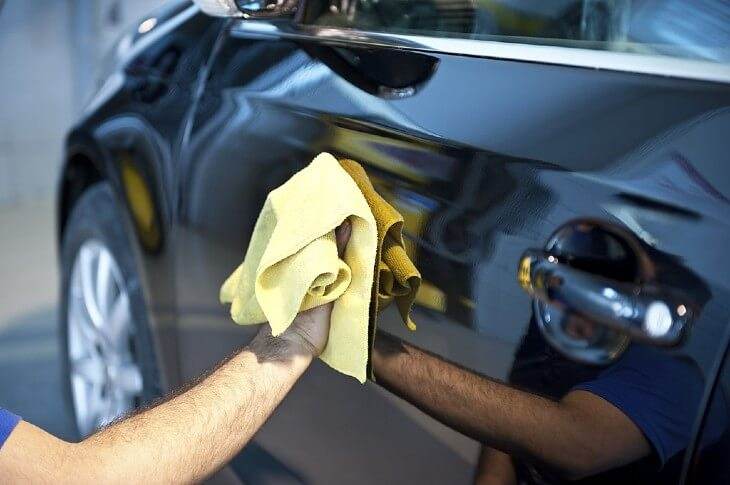
You may find this hard to believe, but not all microfiber towels are the same. And when it comes to talking about microfiber, it’s important to understand the density of the cloth. You see, microfiber towels are classified/measured according to density, which is expressed as GSM or grams per square inch. Generally, a higher density means a thicker, plusher, or more absorbent microfiber towel like 600 to 800. Also, the microfiber blend ratio should also be considered. Microfiber is composed of two materials: polyester and polyamide. For drying cars, you’ll want a microfiber towel with a higher polyamide ratio. For example, if you have two towels with 80/20 and 70/30, the latter is better for drying cars because of the 30-percent polyamide ratio.
Tip 20: Remember friction? Wipe the exterior gently.
Using a thick and plush microfiber drying towel, fold it in half and begin drying the uppermost portions of the car. Yes, this means first wiping the hood, roof, and trunk before working your way to the doors, fenders, and bumpers. Wiping from top to bottom also prevents scratching while allowing you to inspect every panel of scratches, swirls, marring, or stains. If you encounter some rough spots under the doors or near the running boards, don’t remove it forcefully using your drying cloth. You’ll end up contaminating the cloth and induce nasty swirls as you wipe another area of the vehicle.
Tip 21: Use pressurized air to dry thoroughly.
You can use a vacuum cleaner (in reverse, of course) or good old air pressure to dry the vehicle faster. The procedure is nothing more than blowing pressurized air to all those nooks and crannies including the door jambs, the edges of the doors, along with the headlights and taillights, and even on the emblems. Hold your pressurized air on one hand while holding a clean microfiber drying towel on the other. As you blow air on a particular surface, wipe the excess moisture using the towel. Using this method is ideal if you’re looking to polish or wax the paint after washing. As you may know, the wax is best applied on a freshly washed and dry surface.
Tip 22: Wipe the exterior side of the windows using a separate towel.
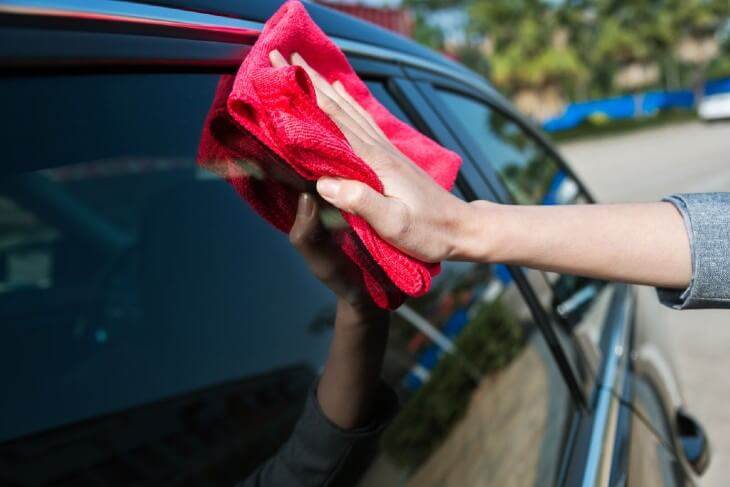
This may sound excessive, but we keep a separate batch of microfiber towels for cleaning the inside and outside of the windshield, sunroof, and windows. Why? It avoids cross-contaminating the glass with dirt picked up from the body. Remember, glass is also prone to scratching, and you wouldn’t want that, right? We like using a less thick towel for cleaning glass which allows more control and feel over the surface. Also, we like using some ammonia-free glass cleaner to reduce the occurrence of hard-to-remove streaks, which means glass needs a set of dedicated microfiber cleaning towels. You can choose not to use a glass cleaner, but it’s better if you do. No matter what, wipe the glass with a clean and dry towel from top to bottom and side-to-side. Wring out the towel if required before wiping the next panel. At this point, your car is already topsy-turvy from the outside.
Tip 23: When to wash your car.
We understand not everyone has the time and luxury to spend a couple of hours each weekend to clean and detail a car. If you have more than one or two cars, the lack of time and attention is magnified further. This also holds true if you live in water-restricted areas. As car lovers, we like to think of cars as raising a kid, and we like our kids to smell fresh and clean. The truth is, washing a car depends on the weather. During the summer, your car will do well if you wash it at least once a week, or sometimes more. This also depends on the amount of protection you have on the paint, and we’re talking about the layer/layers of wax protecting the clear coat.
Tip 24: Wash your vehicle more frequently in cold weather
This holds true if you live in places with extreme snow. During the winter, salt is sprayed on major roads to quickly melt ice and snow. You see, driving over snow is not as easy as it seems, and the local government utilizes a mixture of liquid salt or brine mixed with water. The brine is sprayed as a liquid and is 100-percent effective. By pre-melting snow and ice, the roads are safer despite the dreary conditions, and the tires have a better grip over snow-covered roads. However, this is bad news for your car. The brine will literally eat away the metal parts under your car, which is a lot of metal parts to think about. This is the reason why small cracks, scratches, or dings on the paint should be treated immediately in cold weather to prevent bigger damage from road salt.
Tip 25: This is why it’s important to always wash the undercarriage whenever possible.
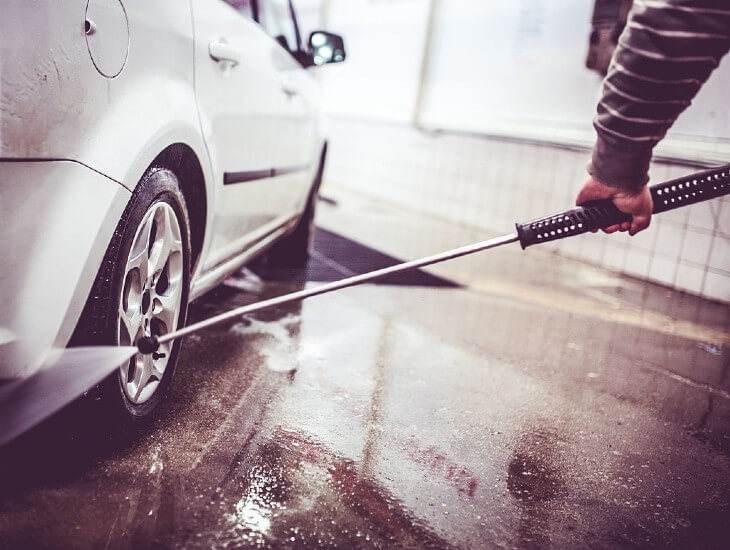
Look, you don’t need to hire a professional to clean the undercarriage. Unless we’re talking about a vintage, collectible, or maybe an heirloom car, you can do the job yourself by following a few simple steps.
- Raise the vehicle with a jack and secure with jack stands. This is useful if you don’t have a lift. But if you do, then simply raise the vehicle to a comfortable height.
- Use a pressure washer with clean water. Spray the undercarriage with water to quickly remove standing dirt, road salt, and grime. Start on the left-front side of the vehicle and work your way to the right-front side towards the middle and the rear of the vehicle. The goal is to thoroughly rinse every square inch of the underbody with clean water.
- If you see a lot of oil stains or gunk under the motor and on suspension parts, you should have the car fixed for leaks, either from the motor, A/C compressor, braking system, shock absorbers, or the hydraulic power steering unit.
- On the other hand, if the leak was recently repaired, you’ll want to get rid of the old gunk by using a degreaser. Or, you can do it the old-fashioned way by using a sponge and a bucketful of dish soap mixed with clean water. Also, you can use car shampoo if you like, but dish soap is better at removing oily gunk and leftover salt.
- After degreasing/washing. Rinse the undercarriage with clean water, again making sure to cover the entire area with blankets of pressurized water. If you have access to hot water, go for it.
- Some people like to wipe off the underbody using a towel, but we prefer to either let it air dry or use mildly pressurized air to speed up the drying process. It’s your call.
- The final step is to give the undercarriage a final visual inspection. Now that the area is clean, grab a small flashlight and comb over the entire area. The idea is to search for rust spots or corrosion damage. If you see some rust building up, it’s probably a good idea to apply some rust protection or undercoating.
- More than just for show, undercoating will provide a durable layer of protection against rust caused by stones, gravel, road salts, etc. Also, undercoating will seal the underbody for a quieter ride with fewer vibrations. Undercoating is best applied after washing and degreasing the underbody. You can apply undercoating using a spray or paintbrush.
Section 2: Paint Decontamination
Tip 26: Consider decontaminating the paint.
After washing and drying the vehicle, you know have a good idea of the condition of the paint. If you have a relatively new vehicle, do this simple test. Gently wipe your palm over the roof, hood, or trunk of the vehicle. This may sound funny, but the surface should be as smooth as glass. If you feel a lot of rough spots or if the surface feels rough, you probably need to polish and wax the surface. This also holds true if you notice a lot of small hairline scratches, swirls, or imperfections on the paint. But if the surface is moderately smooth, applying a nice layer of pure carnauba wax will magnify the shine and protection over the paint. But if you feel a lot of imperfections like deep-seated dirt, brake dust, caked-on bird poo, or dried tar/asphalt, you should decontaminate the paint before polishing or waxing.
Tip 27: Remember, contaminants will cause scratches.
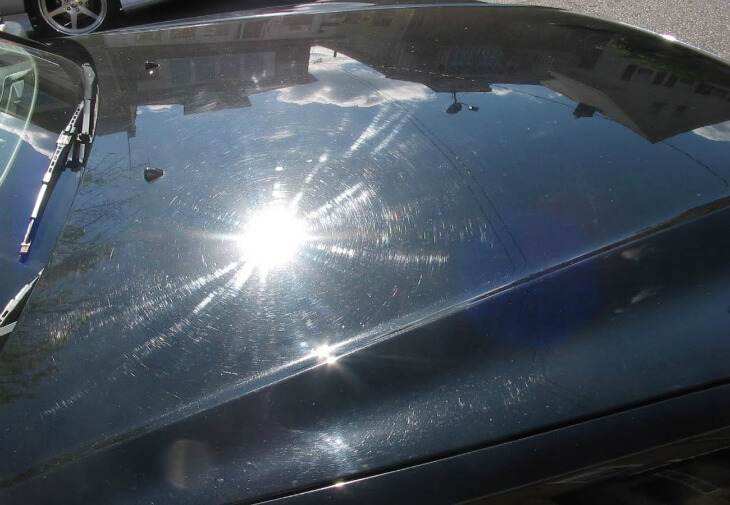
Some polishes and waxes are abrasive enough to remove tar, asphalt, brake dust, and iron-based contaminants. But this can also cause scratches as you wipe off the dirt. There are two ways to easily remove paint contaminants while somehow minimizing friction: use a clay bar and/or iron cleaner. However, both methods employ different tactics.
Tip 28: What you need to know about clay bars and claying a vehicle.
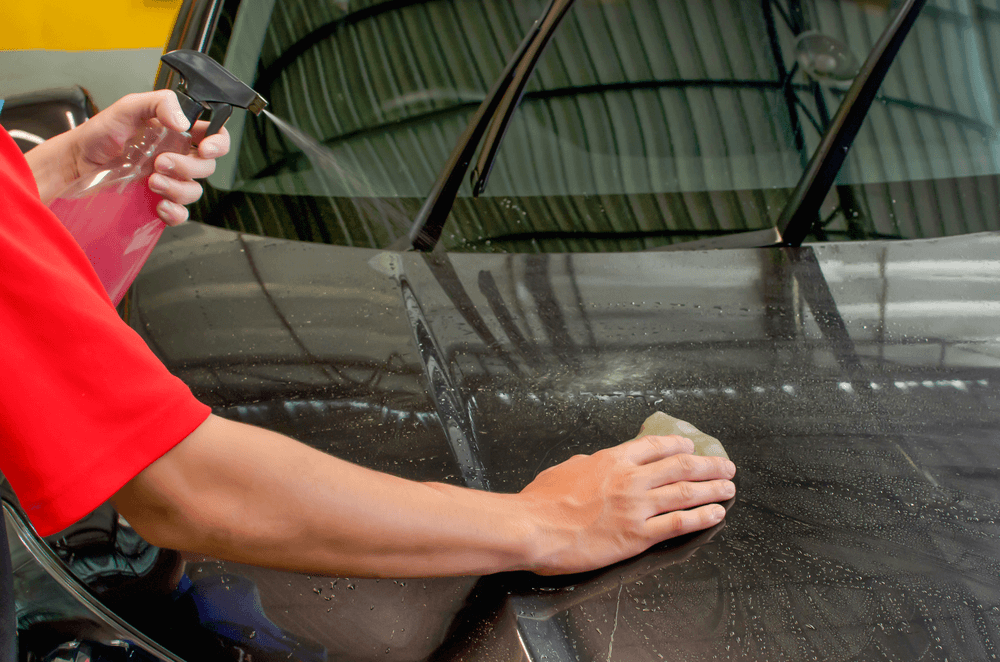
The experts are right. Clay bar should be somewhat a last resort and should only be performed sparingly, and by that we mean not more than once or twice a year. Using a clay bar means gingerly wiping the paint over and over with some clay and lubricant. And as we mentioned over and over again, we should look for ways to always minimize applying friction over then paint to prevent damage, which is the exact opposite when using a clay bar. But when it comes to effectiveness, it’s hard to argue with a clay bar. We like using clay in conjunction with iron removers for a complete decontamination process. We highly recommend polishing – or at the very least, waxing – the surface after the decontamination is complete.
Tip 29: Why wax after using a clay bar? Here’s why.
Clay works like a magnet but necessitates direct contact. Unlike a magnet, clay will pull off the dirt and contaminant as the clay glides over the surface. And what do you think happens to the surface where the dirt used to be? That’s right. It’s now left with an open void on the clear coat surface. Think of it as teeth marks when biting an apple. Those voids or small cracks on the clear coat can easily attract more dirt from lodging in the voids, which again magnifies the incidence of potentially scratching the surface. It’s like an open pothole waiting to wreak havoc on your precious alloy wheels.
Tip 30: Waxing after claying will level the voids left by contaminants.
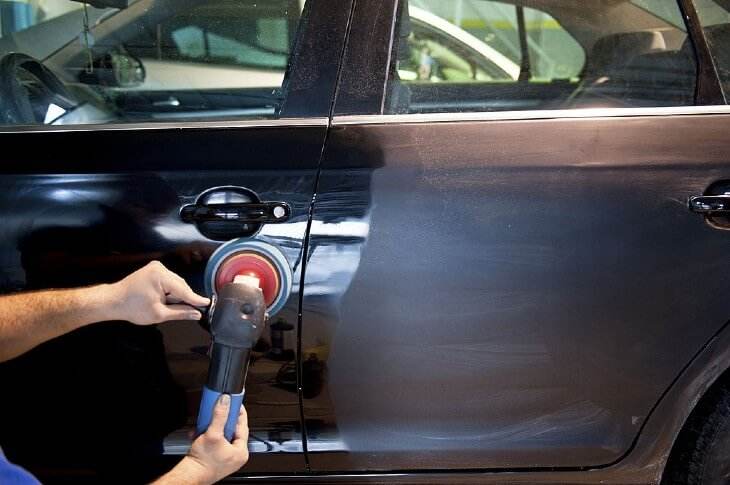
There are many types of waxes in the market. However, the very best kind is formulated using pure carnauba wax. Wax not only leaves a shiny layer of protection on the clear coat, but it fills the microscopic voids on the paint. This leads to a smooth, intense, and flawless shine. You see, scratches and swirls will disrupt the light particles as it bounces over paint. This is why scratches are more visible when viewed over direct sunlight. Waxing will seal off the small cracks and voids in the paint after claying. This seals in the shine and provides a smoother and better-protected finish.
Tip 31: How about iron cleaners?
Here’s the sad fact: Washing alone is not enough to remove deep-seated contaminants like rail dust, brake dust, tree sap, mineral spots, and tar/asphalt. And while we’re against using harsh chemicals when cleaning and detailing a car, there are times when stronger weapons are necessary to win a war. And when it comes to dealing with iron-based contaminants and other hard-to-remove stains, nothing beats an iron remover or chemical cleaner.
Tip 32: When to use an iron cleaner.
We don’t recommend using an iron cleaner after every washing, and this is despite claims of iron cleaners to be pH-balanced and 100-percent acid-free. However, iron cleaners are great whenever you’re planning to polish and/or wax the paint. Also, we highly recommend iron cleaners after the end of every season as part of a comprehensive cleaning and decontamination process.
Tip 33: How to use a clay bar and iron cleaner?
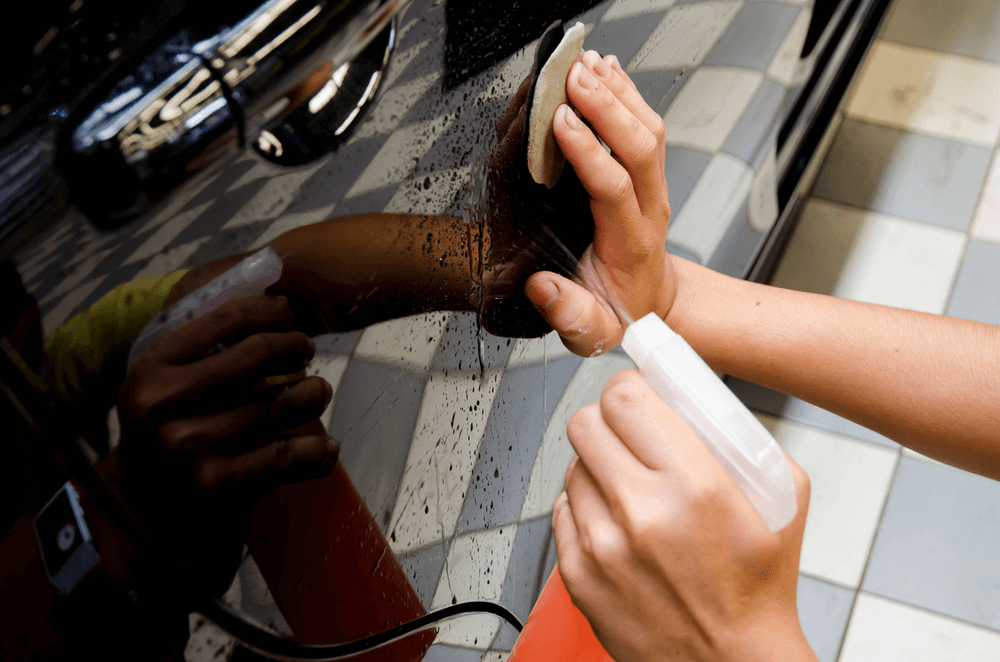
The best method is to use an iron cleaner before claying. All of this should be done after washing and rinsing the vehicle. Sometimes, we wash and dry the vehicle before treating the paint with an iron cleaner, but you can apply iron cleaner before drying the vehicle. The important thing to remember is to rinse properly.
Here are the easy steps on how to use an iron cleaner.
- After washing and rinsing the paint, spray iron cleaner over contaminated surfaces. You will notice the cleaner changes color to red or dark purple as the solution contacts iron particles.
- Allow the cleaner to dwell or soak for a minute or two. Spray more if needed, but you only need to spray a small amount in each particular area of the paint.
- Rinse off the iron cleaner using clean water.
- And that’s it. You can proceed to dry the vehicle or use a clay bar immediately after.
After the iron cleaner, it’s the perfect time to use a clay bar. Here are the easy steps on how clay a vehicle.
- Prepare your tools. You’ll need some clay lubricant or half a bucket of water mixed with car shampoo. Clay needs lubricant as it glides over the paint. Without lubricant, the chances of scratching the paint are magnified exponentially. With that being said, never clay a vehicle without lubricant. Water alone is not an ideal lubricant as it tends to bead or flow down the surface immediately.
- Take the clay out of the pouch/box and rip it into two. For the most part, you’ll only need to use a small amount of clay to treat an average sedan. Knead the clay into the size of a small polishing pad so it’s big enough to hold firmly in your hand.
- Start claying the upper portions of the vehicle before treating the lower parts such as the bumpers and around the fenders. This helps minimize cross-contaminating smooth surfaces with self-inflicted scratches. Work with a small area at a time, making sure the surface is soaking in lubricant before wiping the clay over the surface.
- Spray enough lubricant until the surface is wet. Gently glide the clay bar using a left-to-right motion to pick up stubborn dirt and embedded contaminants. Don’t hesitate to apply more lubricant is deemed necessary. Remember, the lube is helping the clay to do its job, and it won’t hurt if you apply more.
- If the clay starts to darken or change color, it means the clay is absorbing a lot of contaminants on the paint. Knead the clay again to reveal a fresh surface and proceed to the next panel.
- If you accidentally drop the clay to the ground, discard it and get a fresh batch. Remember when we said clay is like a dirt magnet?
- Finish off by rinsing the treated surfaces with clean water.
- Rub your hand over the paint. Does it feel as smooth as a baby’s skin? Congratulations, you’ve done it right. Do you still feel rough spots? Knead the clay and try again, making sure to apply copious amounts of lubricant before rubbing the clay over the paint.
- Once done, give the vehicle a final rinse and you’re done with decontaminating.
- Dry the vehicle accordingly using a thick microfiber drying cloth.
Tip 34: Iron cleaner is also great for removing brake dust on alloy wheels
Wheel cleaners are designed to remove dirt, but it’s not strong enough to remove brake dust. On the flipside, iron cleaners are an easy and effortless way to dissolve brake dust without the need for heavy scrubbing. Apply iron cleaner after washing and rinsing the wheels. In this way, the cleaning solution can focus on the task of removing leftover contaminants – the type of which is the hardest to remove. Spray a copious amount of iron cleaner on the wheel surface and watch the magic unfold. As the solution turns red or purple, you know the product is working. Don’t hesitate to spray iron cleaner on the inside of the wheel and along the brake calipers. Soak the cleaner for two to three minutes before rinsing off. What we like to do is to grab a small wheel cleaning brush to lightly agitate the iron cleaner on the wheels before rinsing off. In this way, we’re maximizing the dissolving powers of the iron cleaner.
Tip 35: You can also use a clay bar on the wheels.
Clay bar is not only good for paint, but it’s also great for removing contaminants on alloy wheels and glass. After treating the wheels with an iron cleaner, you can finish the job by giving the wheels a final rub down with the clay bar. This can make a huge difference as clay can pick up what the iron cleaner failed to dissolve. As with using clay on paint, adequate lubrication is the key. For this job, you can use clay lubricant or a fresh batch of clean water mixed with car shampoo in a small bucket. Apply the sudsy water using a wash mitt or wheel sponge and rub the clay gently. Remember to knead the clay immediately once the surface begins to change color. This technique works on all types of wheels like stainless, magnesium, chrome, and even on painted wheels.
Tip 36: Rinse well after claying the wheels.
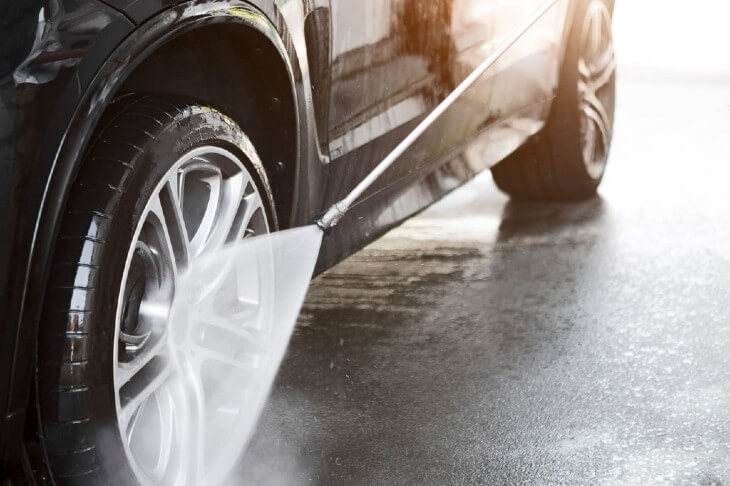
As usual, it’s important to rinse the wheels properly after claying. Use pressurized water whenever possible, making sure to remove all traces of soap to prevent ugly spots. Next, grab a separate microfiber or chamois cloth to dry the wheels. By this point, your car will be gleaming with pride after some thorough washing and decontamination. For the next part, we’ll talk more about cleaning the windows before proceeding to polish and wax the paint.
Section 3: Cleaning And Decontaminating Automotive Glass
Most experts will argue that cleaning the glass should come immediately after polishing and waxing the paint, which actually makes a lot of sense. For starters, the wax or polish can sling on the glass, so cleaning the glass before waxing means you may need to clean the glass again after polishing and waxing.
But what if you won’t polish or wax the vehicle? And while most of the dirt from glass is removed by washing the car, you’re not addressing the source of the problem, which occurs in the form of deep-seated contaminants on the windshield and windows.
Tip 37: Those contaminants that adhere to paint will also stick to glass.
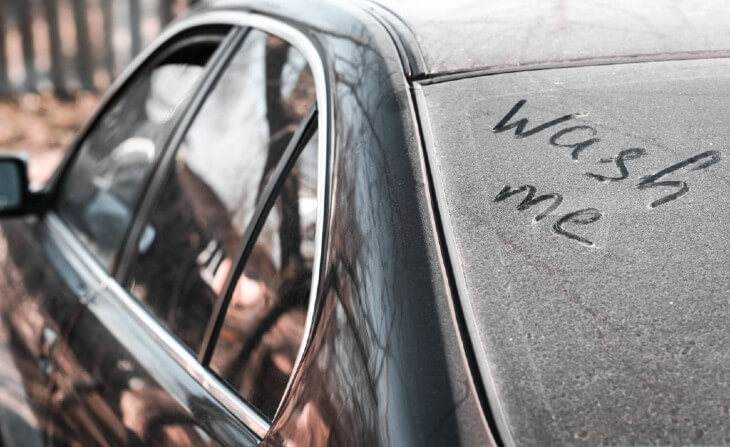
Yes, that’s right. Your car’s windshield may seem tough and hard, but the surface is as vulnerable as paint in terms of road contaminants. Automotive glass receives a fair share of dirt, bug stains, tree sap, and most of all – ugly water stains. Dirty glass is a big no-no in the detailing world, and it also affects visibility. Take a closer look at your car’s windshield and exterior glass surfaces. Do you see water stains on the glass? If yes, you’ll need to deep-clean or decontaminate the glass. Run your palm over the windshield – do you feel rough spots as well? If you say yes to both, you should consider decontaminating the glass after washing the car.
Tip 38: But cleaning the glass is not as easy as it seems.
Why? Glass tends to streak, and it streaks a lot. In order to avoid this, you need to remember two things:
- Only use a microfiber towel in cleaning glass. Also, make sure your car’s windows have their own set of microfiber towels to avoid cross-contamination. For example, it’s foolish to use a waxing or polishing towel on glass since the residue might cause streaking. This may sound excessive but segregating your towels will go a long way in saving you time and money.
- Never use glass cleaners containing ammonia or other harsh ingredients. Chemicals such as ammonia will cause streaking. Also, soap, dyes, and artificial scents also cause streaking.
Tip 39: How to safely decontaminate automotive glass.
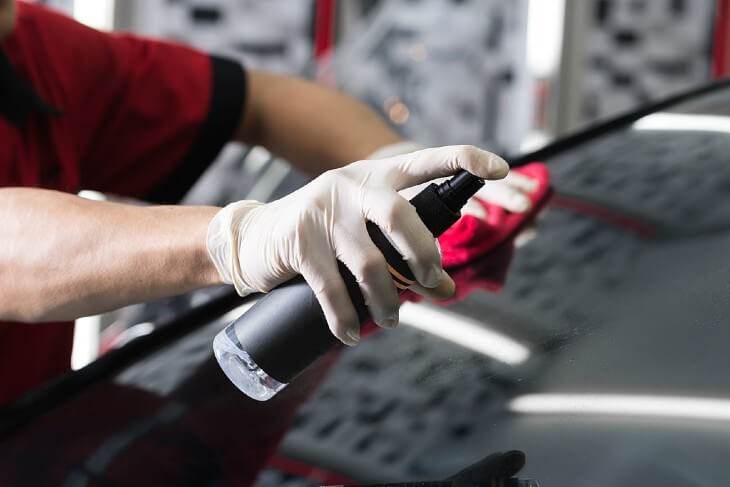
There are two ways to do this. First, you can use a glass scraper knife combined with a glass cleaner. This helps to remove water spots and baked-in mineral deposits without harming or scratching the glass. Remember, you don’t want to induce deep scratches on your vehicle’s windshield or windows unless you’re planning to spend huge money in replacing it. Similar to working on paint, minimizing friction is the key to achieving clearer and cleaner glass. The next method is to use a clay bar. Yes, a clay bar is also great on glass and is an easy way to remove contaminants on the surface.
Tip 40: Scrape and clay.
In truth, you can choose between scraping and claying, but we like to employ both methods. In some cases, using a clay bar is not enough in removing deep-seated and caked-on mineral deposits. And while scraping the glass means inducing a lot of friction on the surface, the glass cleaner will act as a lubricant to minimize friction as you scrape.
- Spray copious amounts of glass cleaner on the glass and glide the scraper knife gingerly from top to bottom. As you do this, notice the amount of gunk you’re removing with a single pass. You can do this repeatedly provided you’re using enough glass cleaner to lubricate the surface. Grab a thick microfiber towel to wipe off the gunk from the bottom of the glass as you scrape. Use a separate towel to gently buff the glass after scraping.
- After scraping the dirt, the glass will be cleaner and smoother than before. But it’s better if you give it a final pass with the clay bar. Again, grab a small piece of clay and knead it into a flat shape. Spray copious amounts of glass cleaner and begin wiping the clay over the glass in a back and forth motion.
- Don’t forget to knead the clay as it changes color, which is a sign the clay is picking up dirt and contaminants from the surface. Grab a clean towel and wipe the glass dry after claying. Repeat the following steps on all glass surfaces including the side windows, rear window, and even on vehicles equipped with a sunroof or glass roof.
- After treating all exterior glass surfaces with a clay bar, give it a final spray of glass cleaner and wipe gently using a clean microfiber towel. By now, the windshield and windows will be as clean and clear as it left the factory.
Tip 41: Don’t forget to clean the interior part of the glass.
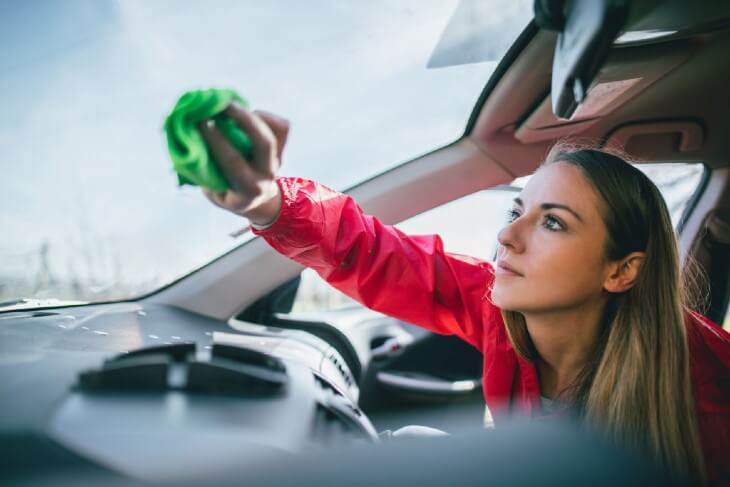
Cleaning the inside part of the glass is not as tedious as cleaning the outside, and this is for obvious reasons. The inside of the glass is not exposed to outside elements and can be cleaned easily with a basic wipe. If your vehicle has tinted windows, wiping the interior glass with a clean, damp microfiber towel is enough to do the trick. But if the windows are bare or devoid of tint, you can use a glass cleaner and a clean microfiber towel.
Bonus Tip: Don’t forget to clean the door mirrors/side mirrors and rearview mirror!
Tip 42: The front windshield demands special care.
The interior part of the windshield is home to fingerprints, smog, smoke stains, and off-gassing contaminants – the type of which are produced as the dashboard plastics and vinyl components are exposed to the sun. Off-gassing leaves an oily and somewhat sticky residue on the glass, which is a bit harder to remove than ordinary dirt and grime. However, you don’t need to use expensive and harmful chemicals to get rid of windshield stains. All you need is a clean microfiber cleaning cloth and glass cleaner. Yes, you can use a homemade cleaning solution of white vinegar, isopropyl alcohol, and clean water along with a couple of sheets of newspaper/paper towel to clean the inside of the windshield. But in our experience, nothing beats the simple yet powerful cleaning action of a basic microfiber towel and high-quality glass cleaner. Fold the towel in half, spray glass cleaner on the towel (two or three sprays will do) and wipe from left to right. Next, turn the towel over and gently buff the glass from top to bottom.
Tip 43: Repeat the same procedure in cleaning the inside part of the rear windshield.
If you like driving with the windows open, you’ll be surprised at how this affects the clarity and visibility of the rear windshield, particularly the inside part of the glass. If your car has window tint, you can remove dirt, smudge, and oily residue using a glass cleaner and a microfiber towel and nothing more. Since glass is prone to streaking (even with window tint), we always follow the ‘less is more’ rule to avoid further contaminating the glass as we clean. Spray ample amounts of glass cleaner on a folded microfiber cloth and gently wipe from left to right. Next, turn the towel over and wipe from top to bottom, making sure to cover every millimeter of the glass surface.
Tip 44: When to clean interior glass.
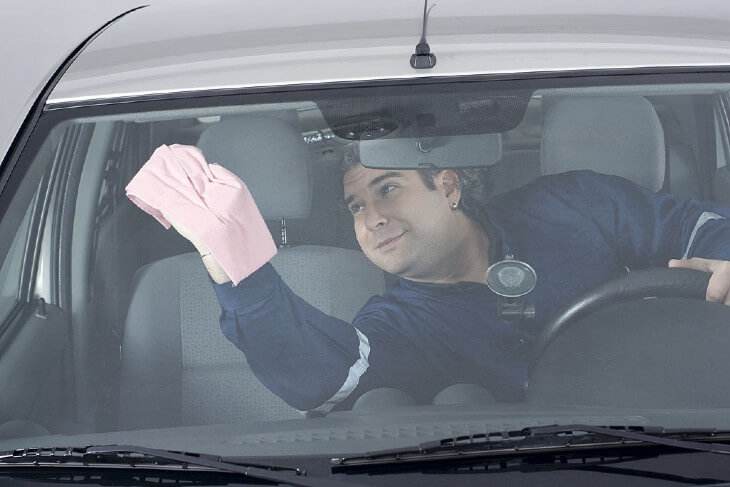
In truth, you don’t need to periodically use glass cleaner in cleaning interior glass. In most cases, all it takes is to wipe the glass with a slightly damp microfiber towel as a finishing touch, making sure to do it habitually after washing the vehicle. This prevents dirt, grime, and other chemically-induced contaminants from building up on the glass surface. What we like to do is to use glass cleaner after every second wash or as deemed necessary. But on any given day, utilizing the powerful cleaning properties of a basic microfiber towel is more than enough to get the job done. This is also part of the reason why it’s important to have a barrage of microfiber towels in your cleaning arsenal, with each group of towels properly segregated for any given application. Remember, do not wipe the glass with a towel that was previously utilized to remove polish or wax, even if the towel was washed prior to cleaning the glass. It doesn’t take much for the glass to streak and wiping it with a contaminated towel is one of the easiest ways to induce streaking or smudges.
Tip 45: Now is the perfect time to vacuum the interior.
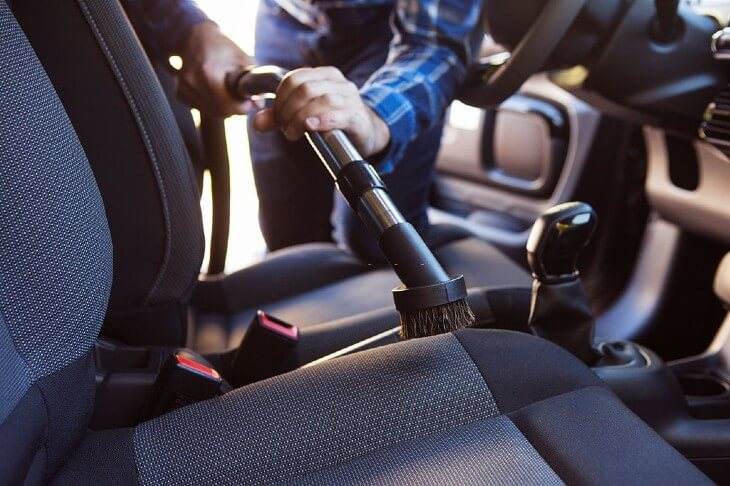
Every car owner should have access to a vacuum cleaner. It doesn’t matter if you have a large or small vacuum cleaner – even the cordless, handheld variety. As long as the machine is capable of sucking dirt, you’re in the clear. It’s a good habit to vacuum the interior of your vehicle at least once a week or as deemed necessary. It will not only preserve the value and appearance of the carpets, but it prevents food particles, dust, and dirt from giving the interior an odd and funky smell. Remove all the floor mats before vacuuming the entire floor and footwell of the vehicle, both in the front and rear passenger compartment. It’s also a good idea to vacuum the seats and the various nooks and crannies inside your vehicle.
Section 4: Polishing The Paint
After washing and decontaminating the paint, it’s time to polish and eventually wax the surface to seal in the shine. You can polish by hand or machine, and both methods work well as long as you know what you’re doing. However, it’s time to clear up some misconceptions about polishing and waxing as both processes are of different worlds.
Tip 46: What’s the difference between waxing and polishing?
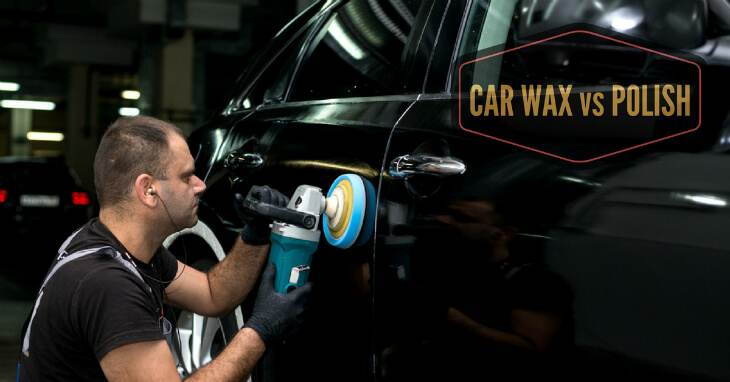
Polishing is different from waxing, and we say this despite the onslaught of products that promise to polish and wax the paint in a single process. Personally, we don’t like using hybrid, two-in-one, or polish & wax products for obvious reasons: polishing is a different ballgame compared to waxing. When you polish the paint, you are essentially removing a small section of the clear coat. It sounds a bit harsh but removing or grinding away a microscopic section of the clear coat is required if you want to eliminate scratches, swirl marks, and other imperfections on the paint. On the other hand, wax is non-abrasive and is only used to seal the clear coat and protect against water spots and UV rays. Also, wax is utilized to intensify the gloss and shine of the paint. These are the reasons why we’re not privy to using two-in-one products that can polish and wax the paint at the same time.
Tip 47: What’s the best product for polishing and waxing?
We insist on using only pure polish when polishing the paint. Check the label or read the instructions. Pure polish should contain zero wax, and pure polish should be followed immediately with a coat of wax. In terms of waxing, the gold standard is still pure carnauba wax. However, you’ll find a plethora of polishes, waxes, and sealants on the market. Some are good, while others are only great for certain types or colors of paint. Ceramic sealants are also worth considering if you have the cash to burn, but most of these hi-tech sealants are best applied by professionals.
Tip 48: Is it better to polish by hand or machine?
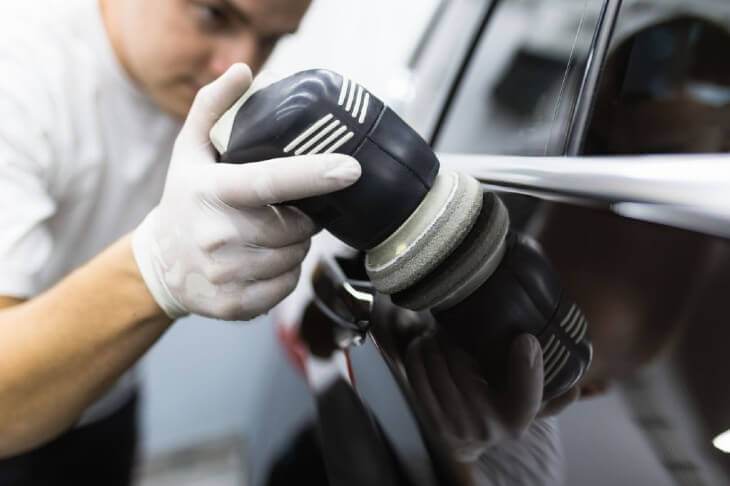
Of course, using a dual-action polisher is faster and more economical. It also produces the best results with minimal elbow grease. But if you don’t have a DA polisher, you can polish the paint by hand, although this may take some serious work. Also, avoid using a rotary polisher whenever possible, particularly if you’re a newbie to the world of auto detailing.
Tip 49: What’s the difference between a rotary and dual-action (DA) polisher?
Similar to polishing and waxing, there’s a world of difference between a rotary and dual-action or DA polisher. In a conventional rotary machine, the polishing head is spinning on a single axis much like a grinder. This action produces a ton of heat and friction on the paint surface. And while you need moderate amounts of heat and friction to polish the paint effectively, too much of both will damage or burn the paint, and it doesn’t take much to do this using a rotary polisher. However, DA polishers or orbital polishers work in a different manner. Instead of spinning on a constant axis, DA polishers have a spindle that also spins around as the head spins as well. This creates a wobbling or oscillating effect, thereby reducing the amount of friction and heat on the paint as you polish.
Tip 50: Which polisher is ideal for beginners?

In truth, DA polishers (or sometimes referred to as orbital polishers) are ideal for both newbies and experienced users. Even professional detailers insist on using a top-quality DA polisher for various detailing jobs. If you’re new to polishing and waxing, we recommend that you stay away from a rotary polisher and get yourself a DA polisher instead. While it’s true that rotary polishers are faster and more aggressive than a DA machine (which is useful when cutting through stubborn oxidation or deeper scratches), it’s also easy to burn through the bare metal if you don’t know what you’re doing.
Tip 51: Polishing by machine? You need the right buffing pads.
There are three major types of buffing/polishing pads: foam, wool, and microfiber pads. When talking about foam and microfiber pads, there are three main categories: compound, polish, and finish. Compounding pads are the most aggressive and are used to remove heavy oxidation. Polishing pads are less aggressive and are ideal for removing light surface defects like hairline scratches and pesky swirl marks. Meanwhile, finishing pads have very little to zero cutting power and is ideal for applying waxes and/or sealants. Remember that different types of pads are required for different types of jobs. Some manufacturers may vary the thickness of the foam or use a combination of both foam and microfiber in constructing the pads. With that being said, it’s easy to get bewildered by the variety of polishing and buffing pads in the market.
Tip 52: In fact, you only need a set of polishing and buffing pads.
If you’re working on a relatively new or used car, you won’t be needing a compounding pad. Unless you work at a paint shop or detailing shop, all you need is to a set of polishing and finishing pads, whether foam or microfiber. It’s a good idea to have at least five pads at your disposal since we don’t recommend reusing the pads. If you’re planning to polish by machine, make sure you have enough pads to complete the job.
Tip 53: How to polish a car? Follow these easy steps.
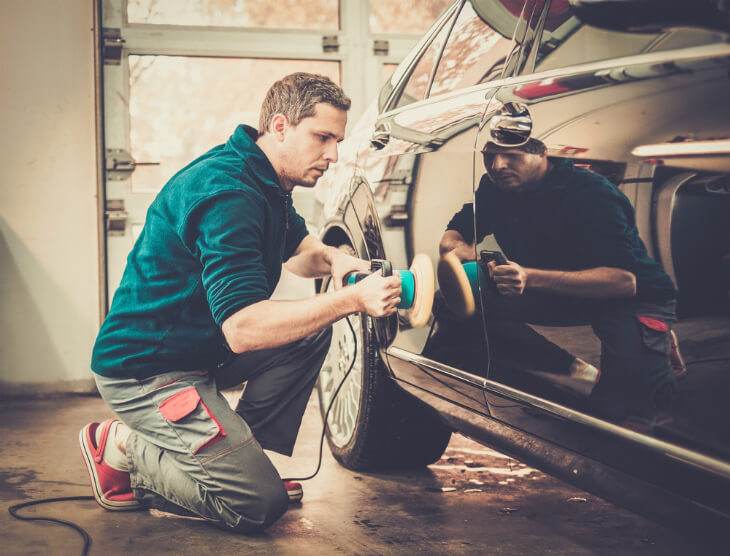
In this section, we’ll discuss how to polish a car by machine. However, we’ll include a couple of helpful tips when polishing by hand.
- Only start polishing after washing and decontaminating the entire vehicle. You should never polish if the paint is dirty or hot to the touch (such as when exposed to the sun). It’s always best to polish in an enclosed or shaded garage.
- After making sure the paint is clean and dry, start polishing the hood, trunk, and work your way to the roof. Similar to the steps in washing and drying the paint, working from top to bottom is key in reducing the possibility of scratching the paint.
- Grab your polishing pad, stick it to the backing plate, and apply five pea-sized amounts of polish on the pad. After that, work the liquid on the pad using your finger, making sure every area of the pad is mildly saturated with polish. Remember, you don’t need to use a lot of polish as it will only sling on the surface once the DA polisher is running.
- Before turning the machine on, position the polisher on top of the area and make sure the pad is contacting the paint. Wipe the pad lightly over the paint before turning the polisher ON. The ideal polishing speed is between 1,200 and 2,000 rpm, or adjust the speed dial to medium.
- Slowly move the polisher in a back and forth motion as you polish the paint, making sure not to concentrate on a single area for more than three to five seconds. Also, work on a small area at a time. Do not attempt to polish the entire hood in one action. The trick is to divide the area into four squares and work your way towards each section.
- Pure polish should not be allowed to dry on the paint. After polishing a small area, wipe off the excess immediately using a dry microfiber towel. Turn the towel over, buff the surface lightly, and take a closer look at the results. If the scratches and swirls are gone, proceed to the next area. If you still see scratches or swirls, you can polish the area again. However, do not over-polish the paint. You can only remove so much clear coat before making direct contact with the base coat underneath.
- If the pad gets too saturated with polish, replace the pad immediately. If you have access to pressurized air, clean the pad by blowing it with air after polishing each section.
Bonus Tip: Polishing by hand? Pour a pea-sized amount of polish on a foam applicator pad, saturate the polish with your finger until the pad is slightly damp with polish, and proceed to rub the paint lightly using a back-and-forth and circular motion, making sure to apply even pressure as you polish. Grab a microfiber towel and wipe off the excess immediately and buff to shine. Do not allow polish to dry to a haze before wiping off the excess. Also, do not apply polish over non-painted surfaces. Read the label to be sure.
Section 5: Waxing The Paint
Remember, you can wax without polishing, but you can never polish without waxing the paint afterward. When polishing the paint, you are essentially scraping off a layer of the clear coat. You’ll need to apply wax afterward to protect the freshly-polished surface.
Tip 54: We prefer carnauba wax, but you can use any wax you like.

As long as we’re talking about pure wax, you can use any type of wax in the market. But we’re a bit old school and we still prefer the durable and natural brilliance of pure carnauba wax. Even though carnauba-based waxes are not entirely blended from 100-percent carnauba (most will only contain 5% to 15% carnauba depending on the product), carnauba is still the hardest and most durable wax in the planet. It also produces the deepest and glossiest shine.
Tip 55: Wax the paint at least once every three to six months.
If you have a brand new car from the factory, it’s best to avoid waxing the paint for the first three months. In truth, you only need to wax the paint at least once every three or six months depending on where you live. In terms of polishing, you only need to do it once or twice a year depending on how you use the vehicle.
Tip 56: Waxing is easy. Here’s how.
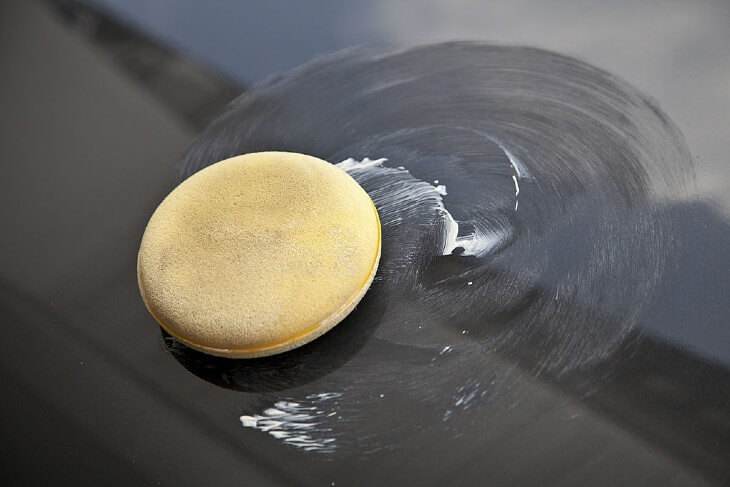
After polishing or decontaminating the paint, applying wax is as easy as pie. You can wax by hand or machine, and the process is the same for both methods.
- Waxing by machine? Grab a finishing pad and apply a small amount of wax all over the pad, making sure the pad is lightly saturated with wax.
- Waxing by hand? Grab a dry applicator pad and apply a small amount of wax on the pad.
- If you have a DA polisher, wax the paint using a lower speed setting.
- Wax from top to bottom, starting with the hood, roof, and trunk before working your way downwards. If waxing by hand, rub the paint gently using small, overlapping circles.
- Allow the wax to dry a haze. Unlike polish that needs to be removed immediately after application, wax needs some time to set before removing the haze.
- Depending on prevailing weather conditions, the wax may take five to ten minutes to set. Want to know if the wax is dry enough? Perform the swipe test. Run your finger on a waxed surface. If you can see the paint clearly, the wax is dry and ready to be buffed. On the other hand, if you swipe your finger and the surface remains hazy, give the wax a few more minutes to dry.
- Remove the haze using a microfiber buffing towel, preferably a thicker and plusher type of towel. Similar to applying wax, removing the haze should be a top-to-bottom affair. Start with the hood, roof, and trunk before moving to the doors, bumpers, and lower portions of the vehicle.
- Turn the towel over and buff lightly to reveal a glossy, mirror-like gloss. Make sure to remove all traces of haze on the paint surface.
Tip 57: Avoid applying wax over glass and non-painted surfaces.
Generally speaking, wax should only be applied on painted surfaces. Avoid waxing rubber/rubberized components and glass unless you don’t mind spending another hour cleaning up excess wax. This is the reason why automotive glass should be treated and cleaned after polishing and waxing. On the contrary, some waxes are safe to use on chrome. In most cases, the wax will serve to protect chromed surfaces from oxidation.
Section 6: Cleaning The Interior
At this point, your car is already clean as a whistle and is beaming with pride! However, the seats also deserve special care.
Tip 58: Wipe the interior clean.
After detailing the exterior, we like to pay special attention to the seats and the interior of the vehicle. The dashboard, console, door armrests, and other interior components can be cleaned using a lightly damp microfiber cloth. However, cleaning the seats is a different story.
Tip 59: How to clean cloth seats? Here are the easy steps.
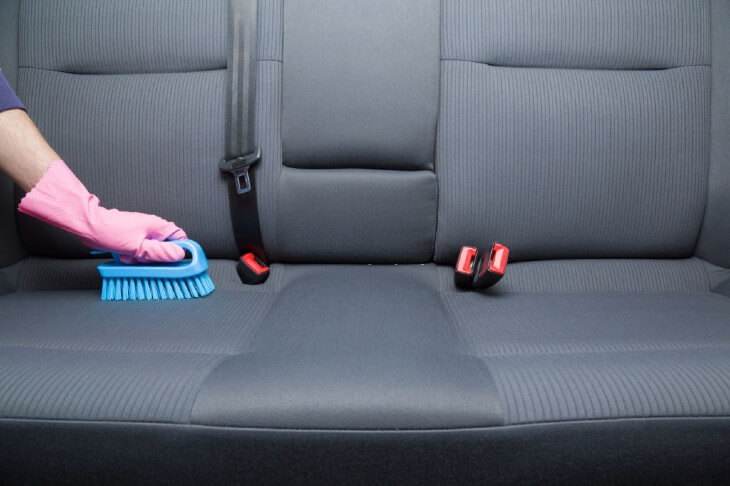
First, let’s deal with cloth or fabric seats. The best way to thoroughly clean cloth seats is to use an extractor or steam cleaner. But if you don’t have access to those, you can remove stains by using a soft interior brush and some homemade cleaning solution consisting of water and a couple of drops of dish soap/laundry detergent in a spray bottle. Spray the cleaner over the seats and use the brush to lightly agitate the surface. Afterward, grab a dry microfiber towel and rub it in a back-and-forth motion to remove excess moisture. You can repeat the process when removing stubborn stains such as lipstick, catsup, or soda stains. After cleaning, allow the seats to air dry by leaving the doors open.
Tip 60: How to clean leather seats.
The leather seats in your vehicle are treated as paint. The hide is dyed to the preferred color before treating the material with a clear topcoat much like the clear coat in the paint. However, this topcoat can fade due to aging or friction. All leather seats are treated with a layer of topcoat. Before cleaning leather seats, it’s best to determine if the layer of topcoat is still present. You can do this by gently rubbing a small section of the leather using a damp microfiber towel. If you notice signs of color transfer on the cloth, it means the topcoat has faded away. Meanwhile, if you don’t see signs of color transfer on the cloth, it means the protective topcoat is still present.
Tip 61: Consider using leather conditioner on old, cracked, or faded leather.
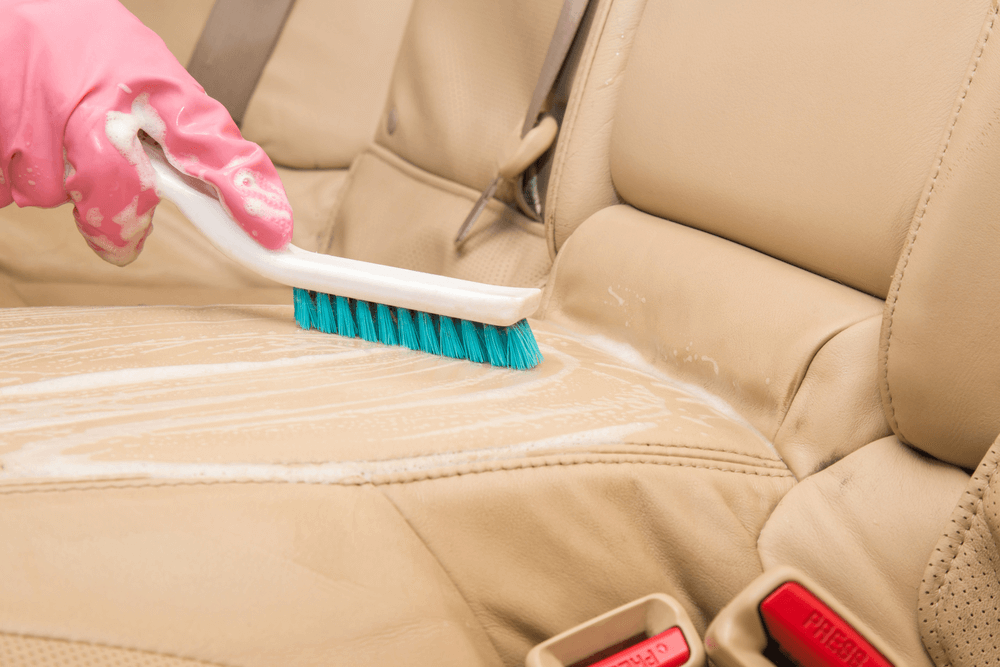
There’s a reason why you need to check for color transfer on leather seats. If the topcoat is gone, you’ll need to reseal the surface using a leather conditioner. However, if there are zero signs of color transfer, a leather conditioner is not required. You see, conditioners are formulated to penetrate deep into the pores of leather materials. If your leather seats have topcoat, the conditioner won’t be able to penetrate deep into the leather and will only rest on top of the topcoat, which also means it’ll only attract more dirt and grime. Otherwise, leather seats can be cleaned using a vacuum cleaner and a damp microfiber towel. You can also use a trusted leather cleaner, but make sure to follow the instructions on the label.
- Wipe the leather seats using a damp microfiber towel. Watch out for signs of color transfer as you wipe. If you do see color transfer on the cloth, treat the upholstery with leather conditioner after cleaning. Remember to read the label, but the basic direction is to apply the leather conditioner using a small applicator pad and remove the excess using a microfiber towel.
- If you don’t see signs of color transfer, there’s nothing you need to do after wiping the seats with a damp towel.
- If the leather has stains or deep-seated dirt (on white or light-colored leather upholstery), you’ll need to use a leather cleaner. Spray the cleaner directly on the surface and use a microfiber towel to wipe the surface clean. Remember to rub gently! Do not apply excessive force when wiping leather seats to minimize the risk of damaging the seats.
- Before the cleaner begins to dry, grab a separate towel and wipe the leather until dry. After this, you’ll see the surface is cleaner and brighter than before. Repeat the steps until all the seats are clean.
- After deep-cleaning the leather seats, it’s also a good idea to apply a light coat of leather shield, although this step is optional. Leather shield or any related product protects the clear coat from abrasion or UV damage. But then again, this final process is only good on relatively newer leather seats.
Section 7: Apply The Finishing Touches
At this point, your vehicle is now as good as new, but we’re not done. After paying special attention to the paint, glass, and interior of your ride, the final touch is to apply tire dressing.
Tip 62: Tire dressing prevents tire blooming.
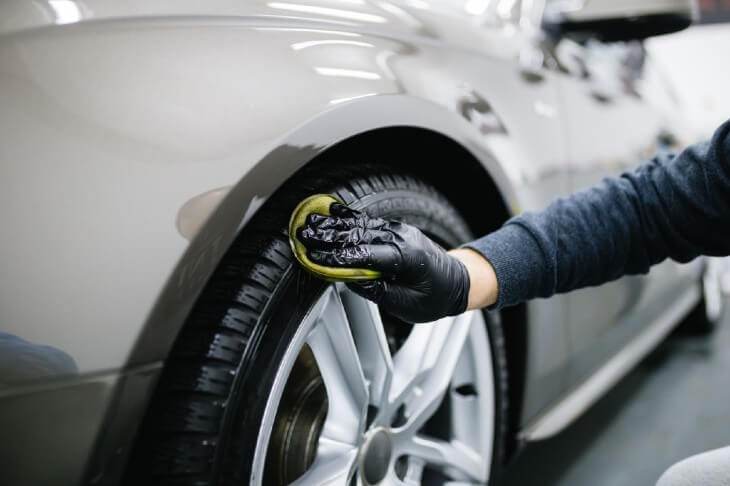
Remember the part when we talked about tire blooming? Contrary to what other people say, tire dressing or tire shine DOES NOT cause tire blooming. In fact, apart from consistent UV exposure, not cleaning the tires regularly is the primary cause of tire blooming. Blooming occurs when antiozonants or certain chemicals utilized in tire manufacturing are oxidized by wind and air, thus causing those ugly brownish stains on the tire sidewall. Regularly cleaning the wheels and tires is your primary defense against tire blooming. Also, tire dressing prevents blooming by treating the tire with UV-protective lubricants.
Tip 63: The two types of tire dressings.
There are two general types of tire dressings or tire shine: water-based and silica-based. The former has a matte appearance and is easier to apply while the latter is thicker and produces a lasting wet-look shine. The only problem with silica-based tire shine is it tends to sling on the paint once the tire gets rolling. Other than that, tire dressings are easy enough to understand. It depends on what you want or the level of tire shine. If you don’t like an overly glossy tire, stick to the water-based variety.
Tip 64: How to apply tire dressing.
You only need two things: tire dressing and a foam applicator pad.
- Only apply tire dressing to a freshly washed and clean tire. Make sure the tire is dry before applying tire shine.
- Pour a small amount of tire shine on an applicator pad and gently wipe the pad all over the tire sidewall.
- Repeat the steps until all four tires are treated with tire shine.
Tip 65: Step back and admire your clean car.
You’re done! Congratulations! Your car is now ready to face the roads with renewed vigor.
Section 8: Additional Cleaning & Detailing Tips
In this last section, we’ll tackle a few more cleaning and detailing tips to make your vehicle stand out from the rest. Remember that your vehicle is an extension of your personality. With that being said, going the extra mile makes a lot of sense in keeping your vehicle topsy-turvy.
Tip 66: Cleaning the engine bay.
When was the last time you cleaned the engine bay in your vehicle? Truth be told, engine detailing is a different craft in itself. The process requires special tools and specialized procedures, with most of it coming from experience. If you have a new car, keeping it clean under the hood is relatively easy. But for older cars, the process is more than wiping the engine components with a soapy rag.
Tip 67: For new cars, here’s how to keep it clean under the bonnet.
New cars have a pristine engine bay from the factory. But after driving the vehicle for a month or two, dust and dirt will begin to accumulate under the hood. In order to keep it clean, make it a habit to periodically wipe the engine cover and other components with a damp microfiber towel. Grab a small bucket and fill it with clean water, dunk the towel in the bucket, wring it out, and wipe. Rinse the towel in the bucket when it gets dirty, wring it out, and repeat. Spending five to ten minutes is all you need to maintain a clean engine bay.
Tip 68: But for older cars, here’s how to clean the engine bay.
If you see a lot of grease, dirt, and smudges under the hood, you’ll need to use a degreaser to restore a clean surface. You can buy a commercially-available engine degreaser and use a pressurized washer to get it done, or you can do it at home using basic household ingredients. If you don’t remove excess dirt and grease, you’ll end up wasting your stack of microfiber towels, which is not exactly the most economical way to clean under the hood.
Tip 69: Here’s a secret degreasing solution to restore a dirty engine bay!
We’ve been using a homemade engine degreaser consisting of water, a small dab of powdered laundry detergent, and some good old unleaded gasoline. Grab a medium-sized spray bottle and mix half a liter of water, a quarter-cup of unleaded gasoline, and a pinch or two (around a teaspoon) of laundry detergent. Remember, a little goes a long way, and you don’t need to use too much gasoline and detergent to remove grease. In fact, this cleaning solution is so effective it can restore the condition of the brake fluid cap from a dirty black to factory white.
Tip 70: First, rinse with water.
When cleaning/degreasing the engine bay, wait until the engine is cool, preferably two hours after using the car. Next, it helps to mildly rinse the engine bay with water using a pressure washer or garden hose. Avoid using strong pressure! Low to moderate pressure will do. As long as your vehicle is manufactured after 1998 to 2003, it’s safe to introduce a little water on the engine bay as you clean since most of the wiring is water-sealed. Otherwise, refer to the owner’s manual of your vehicle. Your goal is to remove thicker wads of dust and dirt before introducing the degreaser. As an added precautionary measure, you can cover or wrap the alternator, the engine air intake, and any exposed filters with a plastic garbage bag and some masking tape to protect against water intrusion. It’s also a good idea to cover the oil and transmission dipstick with a plastic bag to prevent water from seeping inside the crankcase.
Tip 71: Spray the degreaser liberally.
Grab the spray bottle and apply the degreasing solution liberally all over the engine bay, concentrating on heavily-soiled areas. Depending on the condition, most of the dirt and grease will literally dissolve and drain away after the first spray. The idea here is to allow the solution to soak for around 10 to 15 minutes. Don’t hesitate to spray more of the cleaning solution as required. However, it’s best to avoid spraying over painted surfaces. If you can’t help it, covering up the front fenders is a good idea.
Tip 72: Agitate the degreaser using a soft brush or sponge.
You can use a soft brush (or a wheel cleaning brush) or a sponge to agitate the degreaser over dirty surfaces. This will further loosen up gummed up dirt, grime, and grease. You can spray more degreaser as you agitate the surface. After soaking, you are now gently scrubbing the engine components to remove a large chunk of dirt and grease.
Tip 73: Rinse gently.
After scrubbing off the dirt, you can now rinse the engine bay with clean water using mild to moderate pressure. Never wash or rinse the engine bay using strong or excess water pressure. The idea here is to remove any traces of soap and degreaser to reveal a cleaner surface.
Tip 74: After rinsing, dry the engine bay using a microfiber towel.
Grab a microfiber towel or synthetic chamois to remove excess water from the engine components. Alternatively, you can use mild air pressure to quickly remove standing water from sensitive electronic components such as sensors, the throttle body, and ignition coils. Do not attempt to start the car unless the engine bay had a chance to dry thoroughly. After wiping it dry, leave the hood open to allow excess moisture to evaporate.
Tip 75: Now is the perfect time to inspect the engine bay.
After washing/degreasing and rinsing under the hood, now is the perfect time to take a closer and thorough inspection. Search for oil or fluid leaks and fix/repair the problem immediately. In most cases, a large portion of accumulated grease, gunk, and dirt under the hood is caused by oil and/or fluid leaks.
Tip 76: Here’s another secret tip we use to maintain a slick engine bay.
After making sure the engine bay is completely dry, we like to spray a bit of protectant on all plastic and rubberized parts. This not only gives the engine bay a slick and cleaner appearance, but it moisturizes and protects plastic and rubber components from fading, cracking, and deterioration. However, the original Armor All is too glossy and leaves a somewhat tacky finish. But for detailing the engine bay, nothing beats the Armor All Natural Finish Detailer Protectant. You can use any brand or type of protectant, but our choice goes to Armor All.
Tip 77: Detailing the engine bay is easy, here’s how.
We only use Armor All after degreasing, rinsing, and drying the engine bay. It’s nothing more than spraying the product liberally all over the engine bay and allowing it to dwell for as long as possible. Ideally, the protectant should be left to soak or dwell for at least five minutes before using a clean towel to buff out the excess. Armor All is effective on plastic, rubber, vinyl, and fabric-covered surfaces, so you can use it freely under the hood. However, since a modern engine is loaded with advanced electronic gadgetry, it’s best to avoid spraying directly over electrical sockets and wiring. The trick is to spray the protectant on a small towel or sponge and wipe the product gently.
Tip 78: How to restore the clarity of headlight lenses.
Most modern cars manufactured from 1998 onwards are equipped with plastic headlight lenses. Unlike your grandpa’s old clunker with heavy glass headlights, plastic headlights are lighter and can be molded into any shape and form, making it ideal for automotive applications. However, plastic tends to haze or turn yellow after many years of weather exposure, thus diminishing the efficiency and visibility of the headlights when driving at night.
Tip 79: How to restore headlights using toothpaste.
Yes, it’s true. Ordinary white toothpaste is good enough to remove mild hazing and oxidation on plastic headlights. However, avoid using toothpaste infused with salts or whitening crystals which may induce scratches on plastic surfaces. Grab a small microfiber towel or terry cloth, apply a small amount of toothpaste on the cloth, and rub it intensely on the plastic lens using small, circular motions. After about two to five minutes of intense rubbing, remove the excess using a clean cloth.
Tip 80: How to restore auto headlights using baking soda and vinegar.
In most cases, toothpaste is powerful enough to scrub away minor oxidation and yellowing. But for severely oxidized, yellowed, or blackened headlights, you need something more powerful than toothpaste. Grab a small bowl and mix two tablespoons of plain white vinegar with a small amount of baking soda to form a paste. Apply the paste using a small microfiber cloth and rub gingerly using small, circular motions. Remove the excess using a separate cloth and buff lightly to see the results. You can repeat the procedure if so desired.
Tip 81: How to restore plastic headlights using a restoration kit.
Honestly, we’re not huge fans of the toothpaste method even though it works on mildly yellowed or oxidized plastic headlights. But if you’re dealing with a severely oxidized set of headlights, it helps using a proper headlight restoration kit. Our favorite is the H&A Headlight Restoration Kit. Unlike other kits with sanding discs, H&A is an easy three-step process. It’s nothing more than wiping each headlight with the included cleaning wipes, wiping the headlights with the drying cloth, and restoring the appearance with the polishing pads. The important thing to remember is to avoid spraying or exposing the headlights in rain or water after restoring to avoid hard-to-remove watermarks.
Tip 82: But for stubborn oxidation, sanding is the only way to restore clear plastic headlights.
Headlight restoration kits are a dime a dozen, but we also like the 3M Headlight Restoration Kit for tougher jobs. Consisting of various sanding discs and polishing compounds, we admit this kit will take a lot of work. However, you get lasting results in exchange. This kit is powerful enough to remove intense clouding and dullness on plastic headlights. What’s more, this kit does not require power tools and can be completed by hand.
Tip 83: Follow the directions.
When using a headlight restoration kit, make sure to follow the instructions, most especially if sanding is part of the process. This allows you to achieve the best results with minimal effort. In most kits, the sanding discs should be utilized in a prescribed order to minimize scratching while removing most of the surface damage.
Tip 84: Is it safe to apply wax on plastic headlights?
The short answer is yes, but under two conditions. First, the wax should be clear (preferably carnauba wax) and not the colored waxes you see on store shelves. Lastly, the wax should be pure wax and not a two-in-one cleaner/wax or polishing wax. Applying a light coat of pure carnauba-based wax will protect plastic headlights from oxidation and UV exposure.
Tip 85: How to wax plastic headlights.
You can wax the headlights as you wax the paint. But if you cleaned/treated the headlights using toothpaste, baking soda, or a headlight restoration kit, it’s best to seal the deal by applying a light coat of wax to protect the finish. The process is nothing more than applying a small amount of wax on a clean applicator pad and apply the wax using gentle strokes. Allow the wax to dry to a haze and remove the excess using a dry towel. Turn the towel over, buff lightly, and you’re done.
Tip 86: How to prevent plastic headlights from yellowing, hazing, and oxidation.
Perhaps the best way to prevent plastic headlights from fogging up with haze is to park your car in a shaded garage whenever possible. It’s also best to minimize sun exposure if the car is parked for extended periods of time. It’s also a good idea to not wash the vehicle until all the components are cool to the touch. But other than that, it all boils down to the quality of your headlights as some car brands use cheaper materials.
Tip 87: Does halogen bulbs cause yellowing and hazing of the headlights?
Yes. Halogen bulbs produce more heat and can accelerate the aging process of plastic headlights. If you’re really concerned about this, you can upgrade to HID headlights which run cooler than comparable halogen bulbs. Also, LED headlight bulbs are also good since the diodes emit less heat than HID bulbs.
Tip 88: Waxing versus spray waxes: what’s the difference?
We’re not huge fans of spray waxes, although we still use it in-between waxing or polishing after washing the vehicle. Spray waxes add another layer of protection over the existing wax on the paint and can help deliver a brilliant shine when applied properly. However, there’s no substitute for polishing and waxing the paint the old-fashioned way if your goal is to produce a flawless shine. For example, if you wax your vehicle every three months, using a spray wax after washing and drying the vehicle will help to preserve the existing wax until the next waxing/polishing session.
Tip 89: The problem with spray waxes.
You see, the biggest problem with spray waxes is compatibility. Some products are developed to work in conjunction with similarly branded waxes and polishes. For example, Turtle Wax ICE Spray Wax is ideal on all exterior surfaces including rubber trim and glass. However, the product is developed using advanced polymers and may cause streaking when applied over paint treated with carnauba or some other type of wax. In fact, the Turtle Wax ICE Spray Wax is best used along with the entire collection of Turtle Wax ICE products.
Tip 90: Spray wax is easy to apply.
If you insist on using spray wax, you should only do so after washing and drying the vehicle thoroughly. The trick is to work on one section at a time and start from the top to the bottom of the vehicle. Spray the wax and wipe immediately using a microfiber towel. Turn the towel over and buff lightly to produce a glossy shine. You can do this after each wash to preserve the existing wax on the paint.
Tip 91: How to detail and restore vinyl convertible roofs.
There are two types of convertible roofs in a modern car: vinyl and cloth. Vinyl is easy to clean and can be cleaned as you wash the vehicle with car shampoo. After drying the vinyl top with a microfiber towel, applying vinyl conditioner like the 303 Aerospace Protectant will restore the appearance while protecting the vinyl from damaging UV rays. After that, you’re done. However, cloth or vinyl ragtops are a different story.
Tip 92: How to clean fabric convertible roofs.
The easiest and most effective way to clean fabric convertible tops is to use a dedicated cleaner like the Raggtop Fabric and Vinyl Cleaner. This product works on both vinyl and fabric tops and contains no bleach. After rinsing the top with clean water, spray the cleaner on a small section of the fabric roof and use a soft brush to agitate the surface. Rinse well using clean water before moving to the next section. After cleaning the entire roof, rinse with water and allow it to dry using a waffle-weave or thicker microfiber drying towel.
Tip 93: Maintaining the carpets and upholstery.
The carpets in your vehicle should also be cleaned periodically, but we’re not talking about a simple vacuuming job (although vacuuming the carpets should be done periodically after each wash). If the factory carpets in your vehicle are littered with ugly stains, consider deep-cleaning the carpets using an interior cleaner like the Chemical Guys Lightning Fast Carpet and Upholstery Stain Extractor. This product contains advanced cleaning agents that penetrate deep and dissolves stains like coffee spills, mud, dirt, juice, grease, oils, and pet stains quickly and easily. The product works well on carpet and cloth seats while deodorizing all treated surfaces with a fresh, clean odor.
Tip 94: How to clean auto carpets.
The first step is to remove the floor mats and to vacuum the carpets. Next, grab an interior cleaner and spray a liberal amount to a small area. Use a soft interior brush to agitate the cleaner and remove the excess using a microfiber towel. The trick is to avoid soaking the carpet with too much of the cleaner for easier removal and faster drying. Repeat the process until all the carpets are clean. Concentrate your efforts on soiled surfaces. You can repeat the process when necessary, but you must take care not to soak the carpets with too much liquid. After cleaning, leave the doors and windows open and allow the carpets to air dry for at least 30 minutes or until dry to the touch.
Tip 95: How to clean fabric upholstery with an interior cleaner.
When cleaning cloth seats, make sure to work on a small section each time. The process is nothing more than spraying the interior cleaner, agitating the surface with an interior brush, and wiping the excess with a clean microfiber towel. In truth, you can use a mixture of dish soap and water to achieve the same results, but some fabrics might not respond well to dish soap or detergent. After cleaning the upholstery, allow to air dry or use a wet/dry vacuum to remove excess moisture.
Tip 96: How to remove lipstick stains on car seats.
Lipstick stains are one of the toughest to clean. The important thing to remember here is to remove lipstick stains as soon as possible for easier cleaning. The longer you wait, the stain will become harder to remove. The first step is to quickly remove and dispose of any chunks of lipstick on the surface. Next, use the dull side of a small butter knife (or a small plastic scraper) to scrape off any remaining lipstick on the fabric. After that, grab a clean paper towel and dab the stain to remove excess lipstick (do not rub on the stain!). The last step is to pour rubbing alcohol over the stain and remove the excess by dabbing a thin microfiber towel directly on the stain. This process is also great for removing chocolate, catsup, and wine stains on fabric and upholstery.
Tip 97: You can also use interior cleaner to remove lipstick stains.
Yes, that’s right. After dabbing the excess lipstick with a paper towel, you can spray interior cleaner directly on the stain. Dab the stained portion using a dry microfiber cloth and check the results. If you still see visible marks of staining, spray again and use an interior brush to agitate the surface. Grab a towel and dab gently to remove excess moisture.
Tip 98: Steam cleaning is the best way to clean the carpets and upholstery.
If you’re really finicky on maintaining a clean auto interior, you should invest in a steam cleaner. This allows you to deep-clean seats, carpets, sidings, and upholstery without using harsh chemicals. Although steam cleaners are expensive, you can also use it to clean the carpets, bedding, and sofas inside your home.
Tip 99: How to remove foul odors inside your car.
Interior odors can be caused by many things. If the odor is caused by food spills or pet odors, the only way to get rid of the awful smell is to look for the source. Odors caused by cigarette smoke can easily be removed by cleaning the carpets, headliner, door sidings, and seats with an interior cleaner. But if the musky smell still lingers (and it happens to the best of use), the safest and cheapest way to eliminate nasty car odors is to use baking soda.
Tip 100: Using baking soda to maintain a clean-smelling car.
If the odor is emanating from the carpets (despite cleaning the carpets with an interior cleaner), sprinkle copious amounts of baking soda directly on the carpets and allow to dwell for at least 10 to 15 minutes or overnight. Make sure the doors and windows are always open to help get rid of the odor faster and to only apply baking soda on dry surfaces. After allowing the baking soda to dwell, remove the powder using a vacuum cleaner.
Tip 101: Baking soda as an air freshener?
If you can use an open carton of baking soda to deodorize the refrigerator in your home, you can do the same inside your car. Simply leave an open carton of baking soda inside your vehicle while parked. You can transfer a small amount of baking soda in a separate container and leave it inside your vehicle to prevent and eliminate ugly odors.
Tip 102: Activated charcoal also works in the same way.
Activated charcoal is an all-natural air freshener that won’t give you headaches, nausea, or allergies. Simply leave a couple of pieces of activated charcoal inside your vehicle (under the seats, in the trunk, etc.) to get rid of mold, mildew, and nasty odors inside your vehicle. Unlike baking soda, activated charcoal keeps working for up to two years. If like us you hate the thought of putting strong chemical-based air fresheners inside your vehicle, consider using baking soda and/or activated charcoal to achieve the same effect in a more natural and Earth-friendly way.
Tip 103: Coffee is also a nice alternative to chemical air fresheners.
Alternatively, you can also use coffee grounds or coffee beans to freshen up the interior of your vehicle. Coffee beans are strong enough to neutralize funky odors and will leave your vehicle smelling great. Simply leave a small bowl filled with coffee beans inside your vehicle, or you can make little bags of coffee beans using some cheesecloth. Scatter the bags around your vehicle to relish the coffee experience each time you drive!
Tip 104: Does your vehicle have a cabin filter?
If your new vehicle is beginning to smell like an old clunker, you should probably inspect and replace the cabin filter. Ideally, the cabin filter should be replaced at least once a year. The cabin filter is usually located under the glove box. Check your owner’s manual to find out how to replace the cabin filter in your vehicle. Periodically cleaning and replacing the filter helps in maintaining a cleaner and fresher car interior.
Tip 105: Invest in a nice set of floor liners.
Unlike cloth or fabric floor mats, rubberized floor liners offer better protection against mud, slush, ice, dirt, spills, and stains. Also, rubber floor liners can be removed and washed repeatedly without deteriorating the material. However, floor liners are created specifically to fit a specific make and model of the vehicle. Make sure to buy a matching set so you won’t have to cut each floor liner to fit perfectly on the floor.
Tip 106: Never allow wet floor mats to dry inside your vehicle.
This especially holds true during rainy or snowy weather. If you have cloth or fabric floor mats, remove it from the interior when it gets soiled with water and ice. Allow the mats to dry before reinstalling inside the cabin. If you have rubberized floor liners, the process is made easier since you can wipe it dry with a cloth after rinsing with water.
Tip 107: Avoid using interior protectant on the steering wheel, shift knob, and pedals.
While it’s true interior protectants like Armor All are recommended for all rubber, plastic, and vinyl surfaces, you should never spray Armor All on the steering wheel, shift knob, and foot pedals in your car. If you haven’t noticed, protectants tend to make surfaces slippery to the touch and should not be applied to the steering wheel and foot pedals.
Tip 108: Wash your vehicle and clean the interior at least once a week.
As a final word, it’s best to wash your vehicle at least once a week to maintain a like-new appearance. While this ultimate cleaning and detailing guide may sound excessive, maintaining a decent shine and a clean interior is an easy way to preserve the resale value of your ride.

