If you are a meticulous car owner, then you probably have the engine bay washed at least twice a year. I am aware that engine washing and detailing takes a modicum of expertise, but I prefer washing the engine bay of my car in the comforts of my home garage. This allows me to inspect the various components under the hood and search for possible oil leaks.
This article is aimed at the car owner who wants to know the proper steps on how to clean the valve cover. If you are brave enough, you can stand to save hundreds of dollars since a simple valve cover repair will only cost you around $20.
What Is The Function Of The Valve Cover?

Via honda-tech.com
I’ll keep this simple. As the engine churns, oil is being pumped to crucial engine parts. This includes the valves, valve springs, and the camshafts. The valve cover also provides easy access to the valve train assembly if repairs or adjustments are required.
But the valve cover is also responsible for catching the oil that is being pumped into the valve train. Hot oil is constantly splashing under the valve cover, which will deteriorate the gasket that connects the valve cover to the cylinder head.
The valve cover is one of the primary sources of ghastly oil leaks. You need to understand that the valve cover is attached to the cylinder head by using bolts and gaskets. The gasket, in particular, will deteriorate as you use your car. When this happens, the seal between the valve cover and the cylinder head will be compromised.
The gasket will eventually shrink or warp due to heat stress. Oil leaking from the valve cover will happen to all cars regardless of the make and brand. This holds particularly true if your car has clocked 30,000 miles or higher on the odometer.
This will also hold true if you’re an aggressive type of driver. If the leak is not repaired immediately, oil could enter the spark plug chambers and affect the performance of the motor. This includes sputtering, engine hiccups at idle, and even black smoke since the oil is essentially burned along with the air and fuel mixture.
How To Clean The Valve Cover
You only need basic hand tools and a couple of new parts to successfully clean the valve cover. It is highly advised to periodically inspect the condition of the valve cover in order to catch oil leaks before they turn from bad to worst.
Things You Will Need
- Socket set and ratchet
- Torque wrench
- Rubber mallet
- Flathead screwdriver
- Valve cover gasket
- Silicone RTV sealant
- Brake fluid or spray cleaner
- Plastic putty knife
- Work gloves
- Brand new spark plugs (optional)
Step 1: Preparation
Always work with a cool engine. You will be foolish if you insist on working with a hot engine. Park the car in a shaded garage and engage the parking brake. Pop open the hood and secure using the hood prop.
Step 2: Safety First
I strongly advise you to wear protective gloves and clear goggles before removing the valve cover. Repeated or prolonged exposure to used engine oil is hazardous and can cause a variety of ailments. This will also protect your hands from gunk and sludge.
Step 3: Remove Parts Attached To The Valve Cover

Via mobiloil.com
Remove the ignition cables or high-tension wires from the spark plugs. You can either pull on the ignition cable or use a socket set to remove the wires.
After this, it is also a good idea to remove the spark plugs. Remove each plug using a socket set or spark plug remover.
Now is also the perfect time to remove all the parts, hoses, or accessories attached to the valve cover. You can use masking tape and a ballpoint pen to label all the parts removed from the valve cover. This will take out the guesswork when re-installing the aforementioned parts.
Note: If your engine is equipped with a decorative plastic engine cover, you may need to remove this first before gaining access to the ignition cables and spark plugs.
Step 4: Remove The Valve Cover Bolts

Grab a socket set and ratchet and proceed to remove the bolts that hold the valve cover in place. It is best practice to carefully label each bolt so you can re-install them in the same holes. Set the bolts aside.
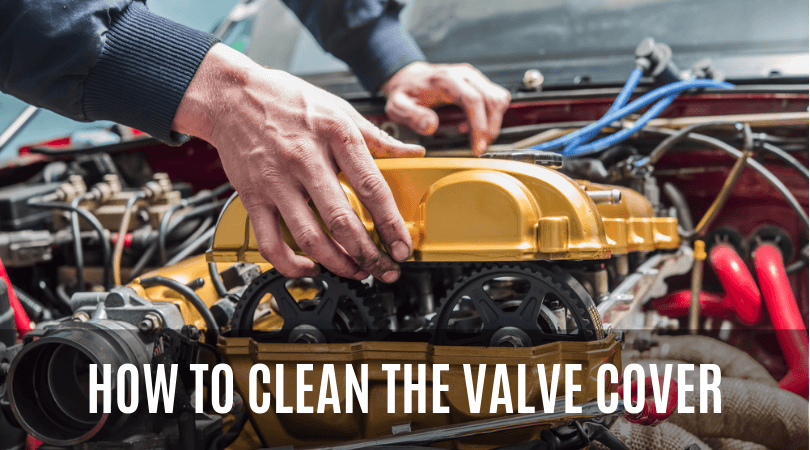
Step 5: Lift Off The Valve Cover

Grab the rubber mallet and lightly tap on the corners of the valve cover to break it loose. The trick is to tap lightly to avoid damaging the aluminum cylinder head.
Once the valve cover is loose, gently lift it up from the cylinder head and set aside.
Step 6: Remove The Old Gasket And RTV Sealant
Use a plastic putty knife to scrape out all traces of melted gasket and sealant on the cylinder head. Take care not to allow pieces of the old gasket to fall inside the engine. You can use some brake cleaner or spray cleaner and a rag to remove any dirt or sludge around the edge of the cylinder head.
Now is also a good time to inspect the spark plug holes for oil contamination. Wrap a flathead screwdriver with a microfiber cloth to remove sludge and clean the spark plug tubes.
Step 7: Clean The Valve Cover

After cleaning the cylinder head, it is time to clean the valve cover. First, use the plastic putty knife to remove any traces of melted gasket and old sealant on the surrounding edge of the valve cover.
Remove oil, grease, gunk, or oil stains by using a small amount of brake cleaner applied to a microfiber towel. You can also a spray cleaner to clean the underside of the valve cover.
Step 8: Reinstall The Valve Cover

Apply RTV sealant to the mating surface of the cylinder head. Next, carefully set the new valve cover gasket over the sealant.
Grab the valve cover and carefully set it over the cylinder head. Insert each bolt in the corresponding hole and tighten using a torque wrench. You should avoid overtightening the bolts since this will do more harm than good.
Step 9: Almost Done
After reinstalling the valve cover now is the perfect time to install new spark plugs and place them inside the spark plug tubes. Tighten the plugs using a socket wrench.
You should also reinstall the ignition cables and all the other parts or hoses that you removed earlier.
That wasn’t so hard, right?
Conclusion
After learning the easy steps on how to clean the valve cover, you should regularly inspect the engine bay for the occurrence of oil leaks. Remember that when it comes to engine oil leaks, prevention is always the best cure to maintain the health of your motor.