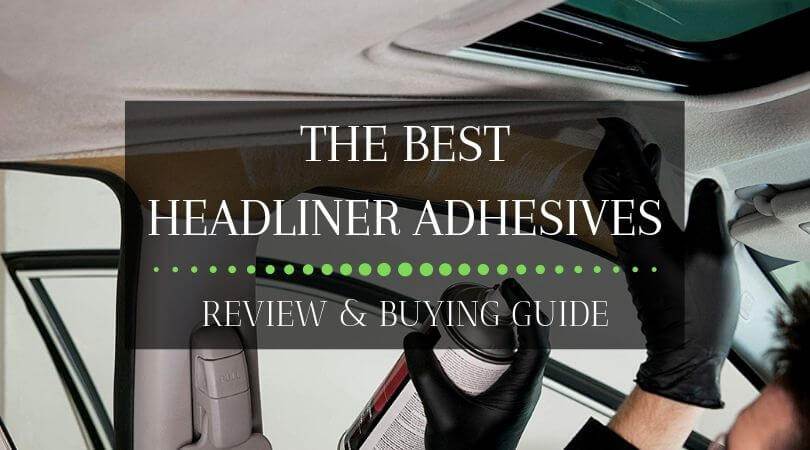
It happens to any make and model of the vehicle. Old cars get it the most, but some poorly made new cars have symptoms as well. We’re talking about a sagging headliner, and nothing is more irritating or ugly looking than a torn, wrinkly, or damaged headliner.
| Product Name | Quality | Price | Our Rating |
|---|---|---|---|
| Design Engineering High-Temperature Spray Adhesive | A | $ | 4 stars |
| Tear Mender Instant Fabric and Leather Adhesive | A- | $ | 4.5 stars |
| 3M 38808 Headliner and Fabric Adhesive | A | $$ | 4.7 stars |
| Gorilla Heavy Duty Spray Adhesive | B+ | $$ | 4.5 stars |
| Scotch Super 77 Multipurpose Adhesive Spray | A- | $$ | 4.5 stars |
| Permatex Body Shop Headliner & Carpet Adhesive | B | $ | 4.3 stars |
| 3M 08090 Super Yellow Trim Adhesive | A- | $$$ | 4.3 stars |
| Loctite Maximum Strength Headliner Adhesive | B+ | $$ | 4.3 stars |
**Below, you’ll find our more detailed reviews, but you can also click the links above to see current prices or read customer reviews on Amazon.
What Causes The Headliner To Wrinkle Or Sag?

This is a case to case basis. I’ve had cars that never had problems with the headliner, while others are not as lucky. But the primary reason why the headliner sags is due to vehicle age. In most cases, these symptoms are more common in ten-year-old vehicles or upwards.
However, it also has something to do with weather exposure. If you live in extremely hot climates like Texas or Arizona, repeated exposure to intense heat will literally melt the old adhesive in the headliner, which in turn is manifested by sagging or wrinkles.
The same holds true if the vehicle is constantly exposed to ice, moisture, rain, or cold weather. Moisture is the next most potent enemy of headliner adhesives. I’ve seen flooded vehicles with flabby or unattached headliners after the wet interior is exposed to the hot sun. Less extreme cases involve neglected liquid spills in the carpets and floors. As the liquid dries in a closed interior, the moisture rises to the headliner and eventually weakens the original adhesives.
The 8 Best Headliner Adhesives Reviewed
In the meantime, if the problem is small enough to merit a quick DIY repair job, here are the best headliner adhesives you can buy today.
1. Design Engineering High-Temperature Spray Adhesive
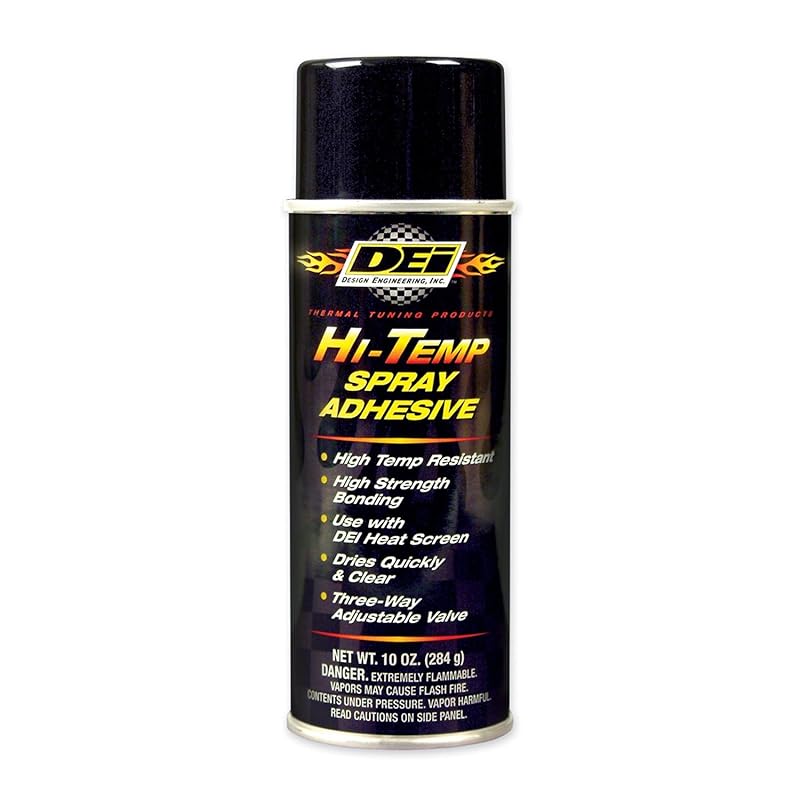
If extreme heat is the culprit, you need a temperature-resistant adhesive that won’t back down when things get hotter still. With that in mind, the best headliner adhesive is the Design Engineering spray adhesive. The formula is engineered to resist heat up to 160 degrees Fahrenheit and dries quick and clear.
This headliner adhesive is also one of the strongest in terms of adhesion. It instantly forms a water-resistant and high-temperature seal when fully cured. The spray can also come with a three-way adjustable spray valve to adjust the spray pattern. There’s no job too big or too small for the Design Engineering spray adhesive.
It’s ideal for bonding fabrics, metals, plastics, trims, foams, and other porous/non-porous materials. The best part? A single 10 oz. can is yours for around $13.
Pros
- Temperature resistant adhesive
- Bonds fabric, foam, plastics, and insulated materials
- The water-tight seal offers protection against molds and mildew
- The strong adhesive dries clear
- Great low price
Cons
- Strong chemical smell
2. Tear Mender Instant Fabric and Leather Adhesive

The Tear Mender Fabric and Leather Adhesive is unique. Unlike the other products in this list, it’s the only one to come with a latex-based formula. When fully cured, it produces a flexible and waterproof bond that is also machine washable. After all, this adhesive is not only intended for headliners and automotive applications. It also works great for repairing fabric and leather materials.
This product does not rely on heat or solvents to produce a strong bond. The adhesive is non-toxic and non-flammable and is resistant to extreme heat and UV exposure. The water-based formula is derived from natural latex and will not harm the skin. It also dries quicker in 15 minutes or less.
But then again, the creamy nature of the adhesive makes it ideal for smaller jobs. While spray adhesives are easier to apply over larger areas, the Tear Mender produces the same strong bond that lasts for years.
Pros
- Non-toxic and water-based formula
- Dries quickly
- Produces a stronger bond
- Affordable price
Cons
- Not practical for bigger jobs
- Product has a short shelf life once opened
3. 3M 38808 Headliner and Fabric Adhesive

When searching for the best headliner adhesives, the 3M Headliner& Fabric Adhesive is one of the strongest. It does take more time to completely dry and form a permanent bond, but it also means it adheres to heavyweight automotive materials with exceptional strength. If it performs flawlessly in heavy-duty jobs, imagine what it can do a basic DIY headliner repair?
This adhesive dries in 30 to 60 minutes. It’s ideal for bonding fabrics or thick carpeting. The adhesive is strong enough to bond plastic, metal, thick foam, and heavier fabrics. It will not stain or discolor the fabric and dries clear for a cleaner look. The formula is engineered to resist extreme heat and cold, humidity, moisture, and early deterioration.
The 3M Headliner & Fabric Adhesive is not exactly cheap at around $20 per can. But it’s versatile enough to be utilized inside or outside the car and around the house.
Pros
- High-strength bond
- Water and moisture resistant
- Bonds porous materials to non-porous surfaces without residue
- Dries clear
Cons
- It takes longer to dry
4. Gorilla Heavy Duty Spray Adhesive
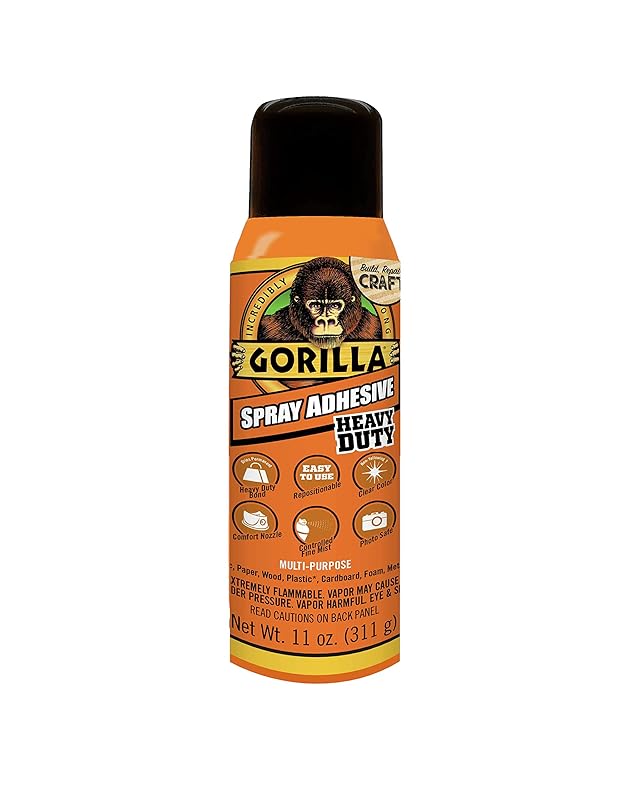
The Gorilla Heavy Duty Spray Adhesive is a multi-purpose product. It works great in fixing the car headliner, but it also works wonders in arts and crafts. The adhesive forms a clear and permanent bond that resists high-temperatures and moisture. Gorilla’s spray adhesive is good for indoor/interior and outdoor/exterior use.
The best thing about this adhesive is adjustability. After sticking the material, the adhesive formula allows you to reposition or adjust the material up to 10 minutes before full curing is achieved. This is especially useful when working on car headliners that tend to wrinkle or move as you stick the fabric.
Gorilla adhesive sprays are equipped with a wide pad nozzle and a fine-mist atomizer. This makes it easy to apply a safe and even coat.
Pros
- Heavy-duty performance
- Dries clear
- Fine mist allows for easy application
- Good for wood, metal, fabric, foam, and plastic
- Great low price
Cons
- Strong chemical scent
5. Scotch Super 77 Multipurpose Adhesive Spray
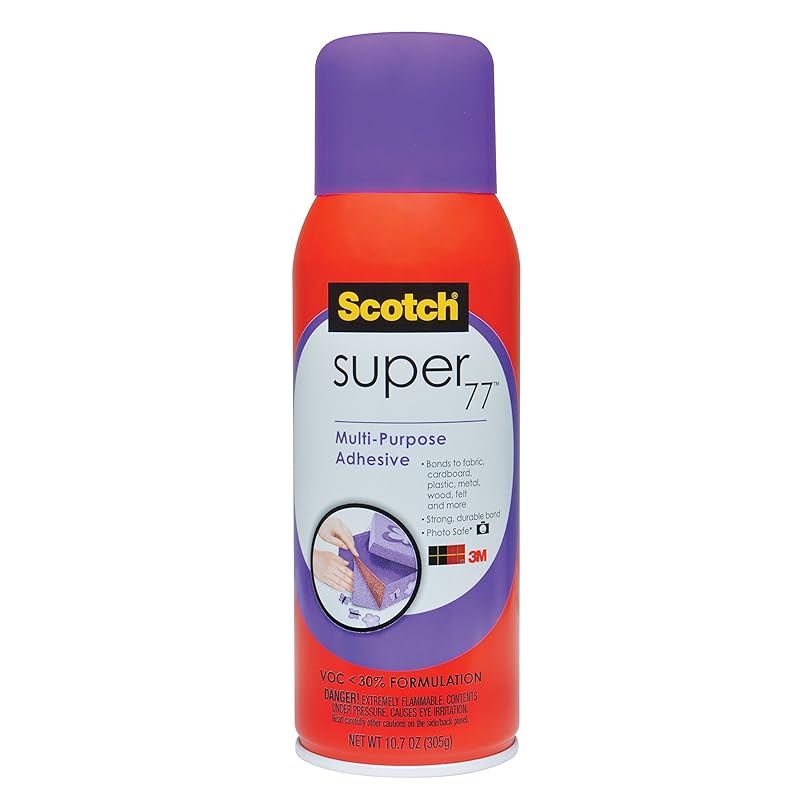
If not for the costly price, the Scotch Super 77 Multipurpose Adhesive Spray should be at the top of this list. It’s not only good for fixing and restoring the look of car headliners, but it’s ideal for bonding paper, cardboard, cushion foam, fabric, wood, metal, and most plastics.
The great thing about this spray adhesive is how fast it dries. It’s essentially a milder version of superglue. This fast-drying adhesive dries clear with no bleed-through. However, we found out it’s mostly ideal for light fabrics. If you have a thicker headliner, or if you’re planning to add insulation when restoring the headliner, this product may not the best choice.
But for quick and simple DIY car interior repairs, the Scotch Super 77 remains an excellent choice. It has a lower moisture content than most headliner adhesives, so it feels dry even when wet. While this is a nice thing to have when working with lighter fabrics, it does allow the adhesive to dry quickly without leaving traces of residue.
Pros
- Good for bonding fabric, metal, plastic, wood, and paper
- Low moisture content dries quickly
- Strong adhesive with no residue
- Easy to use
Cons
- Not ideal for heavier jobs
- It’s a bit expensive
6. Permatex Body Shop Headliner & Carpet Adhesive
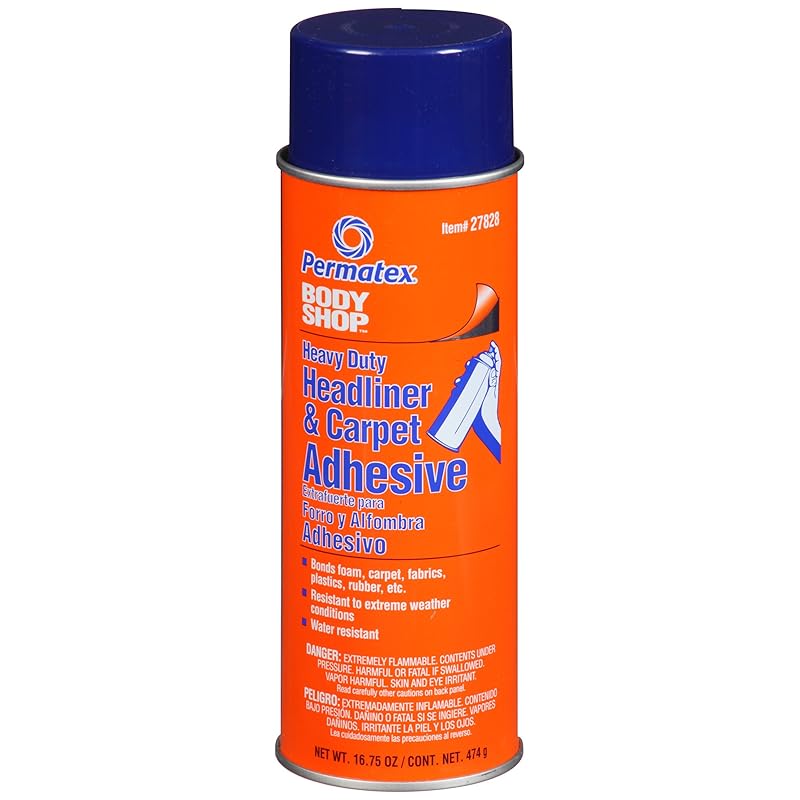
The Permatex Body Shop Headliner & Carpet Adhesive is a high-strength spray that makes quick work of detached, loosened, or sagging headliners. The formula is strong enough to bond thick fabrics like carpet, foam, trunk liners, and door panels without leaving an ugly residue. Permatex ensures the product dries clear to produce a cleaner and neater appearance.
The adhesive is strong enough to resist moisture, water intrusion, and temperatures up to 170 degrees Fahrenheit. It only costs $10 per can and the atomizer allows for easy application and even coats.
Pros
- Great for heavy-duty jobs
- Bonds fabric, foam, carpets, and door panels
- Dries clear
- Great low price
Cons
- Thicker coats are required to produce a strong bond
7. 3M 08090 Super Yellow Trim Adhesive
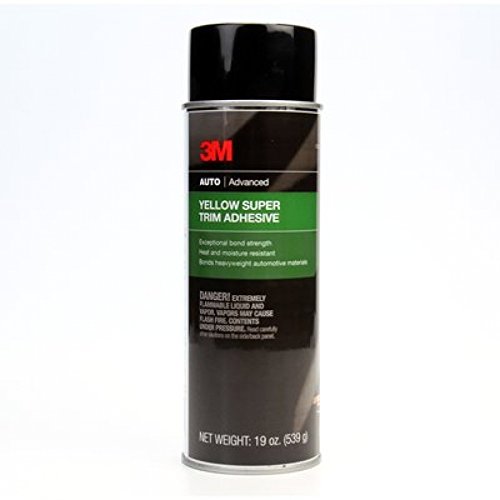
This 3M super Yellow is different from the other 3M-branded headliner adhesive in this list. This particular product is specifically intended for heavy-duty use. This not only includes headliners and carpets but hood silencer pads and heavyweight liners as well.
3M’s Super Yellow Trim Adhesive is the ideal choice for high-strength and heat-resistance applications. It’s not exactly cheap at $27 for a 19 oz. the spray can, but the fast-acting and the quick-drying formula is strong enough to bond heavier porous/non-porous materials with relative ease. However, this spray-on adhesive is not advisable when bonding flexible rubber trim.
If strength, durability, and heavy-duty adhesion is what you want in a headliner adhesive, take a second look at the 3M 08090 Super Yellow Trim Adhesive.
Pros
- Produces a strong bond
- Quick-drying and the fast-acting formula is great for heavy-duty materials
- Sprays easily
- Dries clear
Cons
- It’s expensive
8. Loctite Maximum Strength Headliner Adhesive
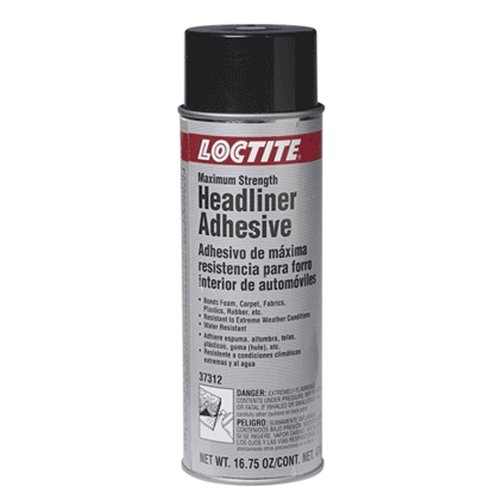
The Loctite Maximum Strength Headliner Adhesive costs less than the 3M Super Yellow. It starts at around $18, and yet it manages to produce the same level of adhesion as the 3M. This spray adhesive is a solvent-based aerosol spray intended for bonding carpet, fabrics, substrate foam, door panels, metals, and plastics.
The strong formula is designed to resist temperatures of up to 170 degrees Fahrenheit. It also dries clear with no overly harsh chemical smells. The spray can is easy to use and dispenses evenly to produce marvelous results.
Pros
- Strong adhesive power
- Great for thicker, heavy-duty materials
- Quick-dry formula with zero residue
- Temperature and moisture resistant
- Affordable price
Cons
- This product is hard to find
How To Fix Sagging Headliner In Your Car

The good news is you only need the best headliner adhesive to complete the job. But in truth, the process of fixing the headliner depends on two main factors: preparation and product application.
If the headliner got damaged due to excess moisture, the headliner is most likely infested with molds. Take a closer inspection and search for molds in the peeled-off sections of the headliner. Molds are also present if your vehicle has leaks in the rubber seals, glass surfaces or windshield, and door frames. Replace the entire headliner and carpeting as needed. Molds can cause severe allergies and serious health risks.
The bad sections in the headliner should be cleaned with a damp cloth before using adhesives. The idea is to remove traces of heavy dirt or stains to create a stronger bond between the headliner and backing fabric. Allow the cleaned section to dry before spraying headliner adhesives.
But if the problem is too big or complicated to fix on your own, it’s time to consult an expert. He/she will know the proper way to remove and install a new headliner.
Step 1: Preparation
Make sure both surfaces are free from dirt, dust, oils, and moisture. Open the doors and windows to allow the adhesive to ventilate as you work inside the vehicle. As a necessary precaution, always wear protective gear and breathing equipment to prevent inhaling the vapors in the adhesive.
Step 2: Application
The matter of applying the adhesive depends on the chosen product. Not all headliner adhesives are made the same, so it’s important to read the directions carefully. Generally speaking, the trick is to apply or spray light and even coats of adhesive on both materials. Allow the adhesive to dry until tacky before applying a second or third coat.
Wait at least five to ten minutes after the final coat before bonding the materials. Some products give you extra time to iron out the wrinkles before the adhesive cures fully.
Step 3: Curing
After adhering the fabric to the headliner, allow the product to fully dry for at least 30 minutes. Avoid touching or adjusting the material during the curing and drying process. When in doubt, refer to the instructions in the can/bottle.
Conclusion
For small tears, we highly recommend the Tear Mender water-based adhesive. But when working on a larger surface area or for heavy-duty jobs, we prefer the 3M 38808 Headliner and Fabric Adhesive.